I'm afraid of being found out.
Seriously, I don't know that I've ever had so much fun at work. Don't get me wrong, I loved working at Guru Labs, but the situation is different here. Let me explain.
At Guru Labs, my bosses seemed to have very realistic expectations of me. They hired me, fully knowing that I had gaps in the technical knowledge that they needed me to have. The promise was that they would help fill those gaps, and I would be ready to teach by the time I needed to. If I was not, then they would give me the opportunity to work elsewhere.
I met the challenge, and before long I was knee-deep in Linux knowledge that I never expected to obtain. There were always new things to learn, and I was always surrounded by people willing to teach me. At the same time, I got to be that person for about a couple dozen students a month. I was having a blast, and I wasn't sure I ever wanted it to end.
There was just one problem. As much as there was to learn, it sometimes seemed like there was never time to learn it. There were always classes to teach, and there was course ware to write, work to be done. I was constantly surrounded by cool new technologies that often felt barely touchable. And suddenly, it was gone, and I was left to look for another job which could never hope to be as much fun.
Fortunately, I had prospects in the queue. By the end of the first week I had applied at close to two dozen companies, interviewed at three of them, and had an offer from one of them. By the end of the second week I had already started work at my new company, and was still politely turning down interviews.
I had actually turned down an offer from this company at the same time I originally accepted an offer from Guru Labs. I had a friend that worked there, but I still had to get hired on my own. When I started, I think the idea was for me to watch my new coworkers and get a feel for what needed to be done. They were programmers who had been doing system administration when it was called for, but it wasn't their thing. Thanks to Guru Labs, I was well-trained in system administration and I just kind of took over.
This is a company who was small (maybe 20 employees) when I first interviewed, and who is now in the process of growing into a larger company (60+ employees at this location, plus the warehouse, plus the call center in Chicago, etc), but who still has the kind of server setup that one might expect at a small company. I have taken it upon myself to make the servers enterprise-grade.
This means I get to play with all of the technologies that I didn't really get to play with before. Well, not all of them, but increasingly more. One of my current projects involves four RHEL 5.2 virtual machines installed on my notebook using KVM, which I am using to test out different MySQL Cluster configurations. This week I also started playing with Cacti, and Nagios is on the horizon.
One day I looked at our current backup server and decided that it needed more hard drive space. Really we needed a brand new backup server, but I was willing to settle for a new hard drive. My boss came in to talk about it, and by the time he left I was pricing out components for a brand new backup server. This is not the first time I've had a boss that knew less than me about what I did, but it's definitely the first time a boss has not only admitted it, but taken my suggestions on what needs to be done.
To be honest, I'm not used to this. I was hired based on technical merit and experience, and then given what feels like free reign to do whatever I want. I don't really have free reign, but it feels like it. My boss realizes that I know what needs to be done, and he's willing to let me do it. He doesn't have some kind of personal agenda, he's not caught up in a power struggle, there's none of that. He's trusting to me do what he hired me to do, and his only concern is that I stay focused on the best interests of the company.
It's so weird. Nearly every day when I drive home from work, I am elated about what happened that day and what's going to happen the next. Actually having my opinion listened to on such a regular basis makes me feel like a rock star. And yes, I'm a little worried that I'm going to be found out. Every so often I wonder if my boss is going to realize how much fun I'm having actually doing my job, and start charging me admission.
I still miss Guru Labs. I certainly wouldn't be in the position I am now without the expert training and unparalleled opportunities that I received there. But I guess fate (if you believe in that sort of thing) decided that it was time for me to cut my teeth elsewhere. I guess it truly is bitter-sweet.
Friday, January 2, 2009

Monday, December 29, 2008
Lasagna
One of my all-time favorite dishes is lasagna. Unfortunately, I don't get to make it very often. It's an easy dish, but to make it right can be time-consuming. It's the type of dish that really benefits from letting the flavors spend some time together. Sure, you can rush this along. Skip over a few steps, cut some corners. But once you've had the taste of a real lasagna done right, you won't go back.
Before you start, make sure you have all of your ingredients together:
1 lb ground beef (80% lean)
Worcestershire sauce, to taste
Italian seasoning, to taste
14 oz mirepoix
1 red bell pepper, diced
30 oz tomato sauce
15 oz canned diced tomatoes
2 teaspoons garlic powder
1 teaspoon smoked paprika
1 lb mozzarella
15 oz ricotta
1 large chicken egg
16 oz dry lasagna noodles
Kosher salt, to taste
freshly ground black pepper, to taste
Some of you are already scoffing at me using things like (presumably store-bought) Italian seasoning and garlic powder. There is no shame in having these things handy. The Italian seasoning I used is pretty dang tasty, and already formulated. I also liked that it, and the garlic powder, were dried. That means you can add them early and have the flavors permeate the dish longer and more easily.
Before you start on any of this, you'll probably want to preheat the oven to 350F, and grease up a 13x9 baking dish with cooking spray. Go ahead and set it aside for later. Our next step is to brown up about a pound of ground beef.
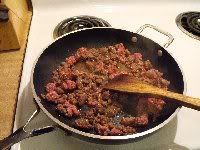
Season to taste with Kosher salt, pepper, Italian seasoning and Worcestershire sauce. I probably used about a Tablespoon of the Italian seasoning and maybe twice that of Worcestershire sauce. Don't cook it too long, just long enough to brown it. And make sure the seasoning is where you want it right now. Trying to compensate later for poor seasoning now isn't going to be easy.
When it's all nice and browned up, spoon it onto a paper towel-lined plate and set it aside. Try to leave as much of the fat in the pan as possible, you'll need it in a moment.
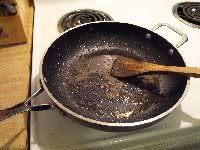
Okay, who here got confused when they saw mirepoix on the ingredient list? Wow, look at all those hands. Don't worry, it's not so bad as you think. Mirepoix is a 2:1:1 ratio of onions to carrots to celery. It's a French thing that works pretty well with Italian dishes. And as it turns out, Kroger has started selling it in the freezer section in little 14 oz bags. Add that, along with the red bell pepper, to the fat and crank the heat to medium-high. We want to get some nice color on these veggies.
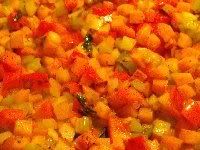
Did I mention to make sure these are well-seasoned? Kosher salt, pepper, Italian seasoning, Worcestershire sauce. Make sure you season each layer of this dish before moving onto the next one. Speaking of the next layer, once you have some color on your veggies, go ahead and cool down the pan a little by adding the tomato sauce and the diced tomatoes.

Time for another layer of flavor. Notice a pattern here? Same drill as before, but go ahead and add in the garlic powder and smoked paprika with the other seasonings (Kosher salt, pepper, Italian seasoning, Worcestershire sauce). Let it simmer for a bit; how long is really up to you. I went for maybe five or ten minutes. I also stole some of it at this point to spread out on the bottom of the baking dish.
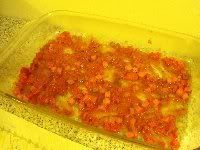
This is important. There are going to be a few layers of pasta in this dish, and you want to make sure you have a tomato sauce layer directly above and below every single layer of pasta. We're not going to use the pasta yet, just keep it in mind.
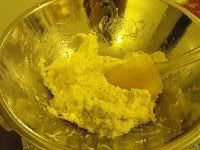
While the sauce is simmering, you'd better get the cheese ready. You're going to put together a container of ricotta, about 3/4 lbs of shredded mozz, a single chicken egg, and maybe a Tablespoon of Italian seasoning. I didn't say this in the ingredient list because I forgot it (oops!), but you can add 1/4 cup of grated Parmesan too. Go ahead and mix it all together in a bowl and set it aside. You'll need it in a moment.
When you think you're ready, and you have a layer of sauce in the baking dish, go ahead and add the meat into the sauce. You want to do this after you've sauced the baking dish, because you really don't want the meat stuck to the bottom. You will want a layer of dried noodles, however.
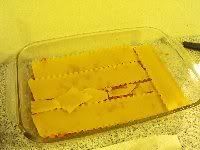
I love this part. Didja notice something about the pasta? Like the fact that we didn't blanch it first? So awesome. See, this is the beauty of lasagna: the moisture from the rest of the dish cooks the noodles for you. Okay, yeah, it'll add another 20 minutes of cooking time or so. But that's okay; the longer it cooks, the better the flavors marry. Your chances of soggy noodles will also decrease. Next up, add a layer of sauce.
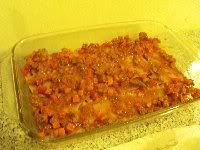
This part is actually trickier than it seems. You see, you're going to have four layers of noodles, with sauce layers on both sides. That means eight layers of sauce, and this is number two. The sauce is important: it's responsible for cooking the noodles. But as tricky as that step was, it doesn't compare to this one: add about a third of the cheese mixture. It's easiest if you dollop it in small increments and then spread it with a spatula.
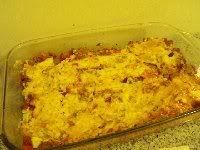
Oh man. You're going to hate me right about now, because it's time to add another tomato sauce layer. And then pasta, tomato sauce, cheese, tomato sauce, etc, until you have your top layer of pasta, and it's covered with sauce. Cover that layer with the last 1/4 lb of shredded mozzarella. Don't worry if it looks a little sparse. It'll be plenty.
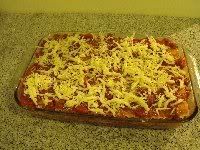
Go ahead and sprinkle, really lightly, some Italian seasoning on top. Remember how I forgot the Parm in the cheese mixture? It may not be a bad idea to sprinkle a couple of Tablespoons on top as well. I'll let you add that to your own ingredient list. Now, go ahead and cover it with some aluminum foil. Try not to let the foil touch any of the cheese.
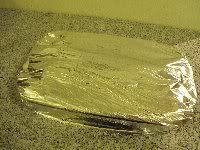
Slide that guy into your 350F oven and give it about 40 minutes. If you think about it, we're really only doing a couple of things here. We're not actually cooking the dish (except for the noodles) because the ingredients are already cooked. That's important to remember with casseroles. You're not cooking them, you're reheating them. Also, we're melting the cheese. But that part really happens at the end. At about 40 minutes, remove the foil and give the lasagna another 10 minutes to melt and maybe even brown the cheese a little.
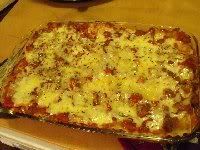
Oh man, doesn't that look good? Well, bad news. You can't touch it yet. I know it's going to be torture, but you need to recover it with foil and let it sit for another half hour. It's gotta have time to cool, and to finish cooking those noodles. If you were to serve it at this point, it would burn your tongue, and the noodles would be a little too al dente.
A few more points before I let you loose on this dish on your own. First of all, I cheated more on the cheese than I let on. For some reason, Monterrey Jack sounded really good that day, so I used that instead of mozz. In the past, I've also mixed Jack and Cheddar. And one of my all-time favorite lasagnas was dubbed "pain lasagna". Instead of tomato sauce, I used hot enchilada sauce. Instead of meat, I used black beans, pinto beans and corn. I didn't mix them into the sauce, I added them as their own layer underneath the cheese layer. Speaking of cheese, I went with hot pepper Jack and habanero Cheddar that time around. It was so good, it brought tears to my eyes. Actually, the tears were mostly from the pain, but the flavor was good too.
Lasagna has a lot of room for interpretation. At its most basic, it's little more than alternating layers of sauce, cheese and noodles. Beyond that, you're on your own.
Before you start, make sure you have all of your ingredients together:
1 lb ground beef (80% lean)
Worcestershire sauce, to taste
Italian seasoning, to taste
14 oz mirepoix
1 red bell pepper, diced
30 oz tomato sauce
15 oz canned diced tomatoes
2 teaspoons garlic powder
1 teaspoon smoked paprika
1 lb mozzarella
15 oz ricotta
1 large chicken egg
16 oz dry lasagna noodles
Kosher salt, to taste
freshly ground black pepper, to taste
Some of you are already scoffing at me using things like (presumably store-bought) Italian seasoning and garlic powder. There is no shame in having these things handy. The Italian seasoning I used is pretty dang tasty, and already formulated. I also liked that it, and the garlic powder, were dried. That means you can add them early and have the flavors permeate the dish longer and more easily.
Before you start on any of this, you'll probably want to preheat the oven to 350F, and grease up a 13x9 baking dish with cooking spray. Go ahead and set it aside for later. Our next step is to brown up about a pound of ground beef.
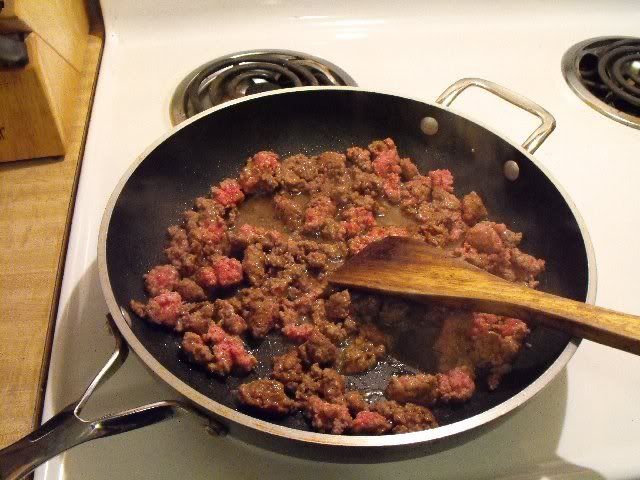
Season to taste with Kosher salt, pepper, Italian seasoning and Worcestershire sauce. I probably used about a Tablespoon of the Italian seasoning and maybe twice that of Worcestershire sauce. Don't cook it too long, just long enough to brown it. And make sure the seasoning is where you want it right now. Trying to compensate later for poor seasoning now isn't going to be easy.
When it's all nice and browned up, spoon it onto a paper towel-lined plate and set it aside. Try to leave as much of the fat in the pan as possible, you'll need it in a moment.
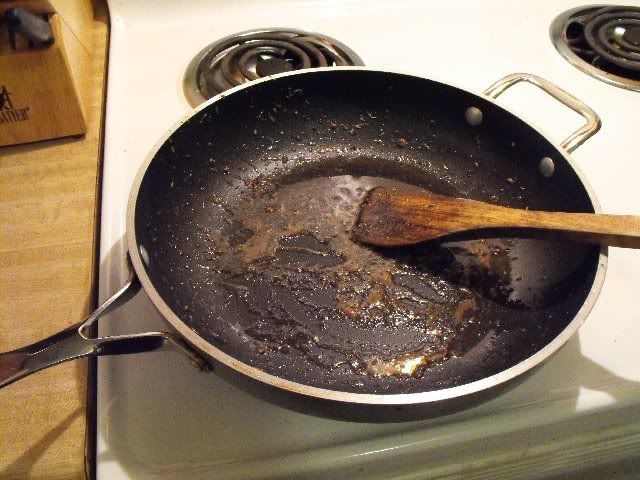
Okay, who here got confused when they saw mirepoix on the ingredient list? Wow, look at all those hands. Don't worry, it's not so bad as you think. Mirepoix is a 2:1:1 ratio of onions to carrots to celery. It's a French thing that works pretty well with Italian dishes. And as it turns out, Kroger has started selling it in the freezer section in little 14 oz bags. Add that, along with the red bell pepper, to the fat and crank the heat to medium-high. We want to get some nice color on these veggies.
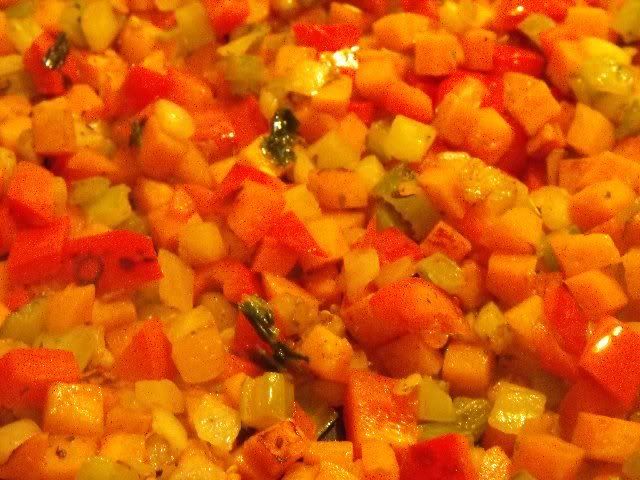
Did I mention to make sure these are well-seasoned? Kosher salt, pepper, Italian seasoning, Worcestershire sauce. Make sure you season each layer of this dish before moving onto the next one. Speaking of the next layer, once you have some color on your veggies, go ahead and cool down the pan a little by adding the tomato sauce and the diced tomatoes.
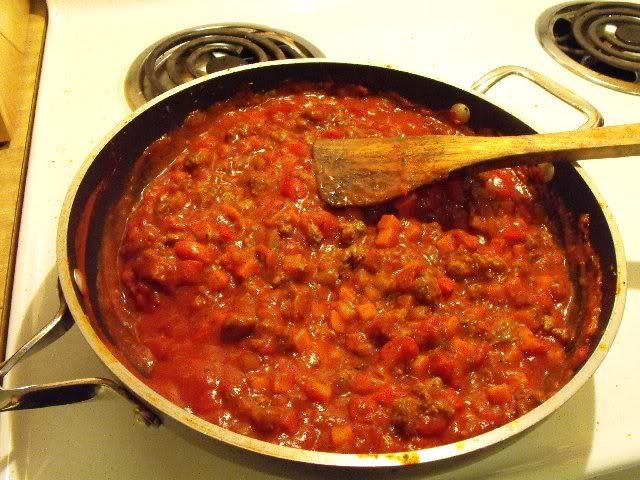
Time for another layer of flavor. Notice a pattern here? Same drill as before, but go ahead and add in the garlic powder and smoked paprika with the other seasonings (Kosher salt, pepper, Italian seasoning, Worcestershire sauce). Let it simmer for a bit; how long is really up to you. I went for maybe five or ten minutes. I also stole some of it at this point to spread out on the bottom of the baking dish.
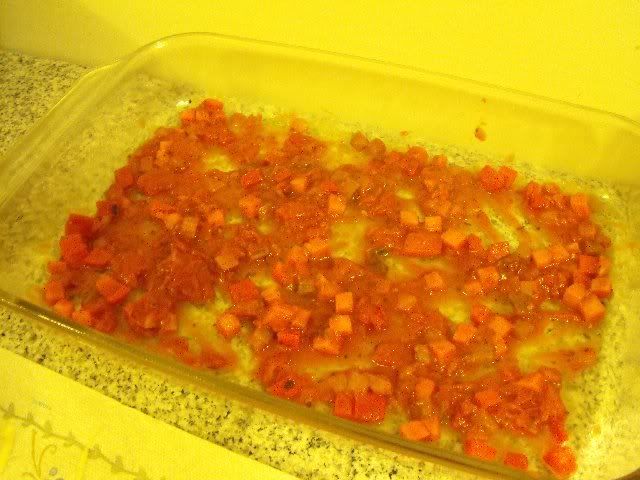
This is important. There are going to be a few layers of pasta in this dish, and you want to make sure you have a tomato sauce layer directly above and below every single layer of pasta. We're not going to use the pasta yet, just keep it in mind.
While the sauce is simmering, you'd better get the cheese ready. You're going to put together a container of ricotta, about 3/4 lbs of shredded mozz, a single chicken egg, and maybe a Tablespoon of Italian seasoning. I didn't say this in the ingredient list because I forgot it (oops!), but you can add 1/4 cup of grated Parmesan too. Go ahead and mix it all together in a bowl and set it aside. You'll need it in a moment.
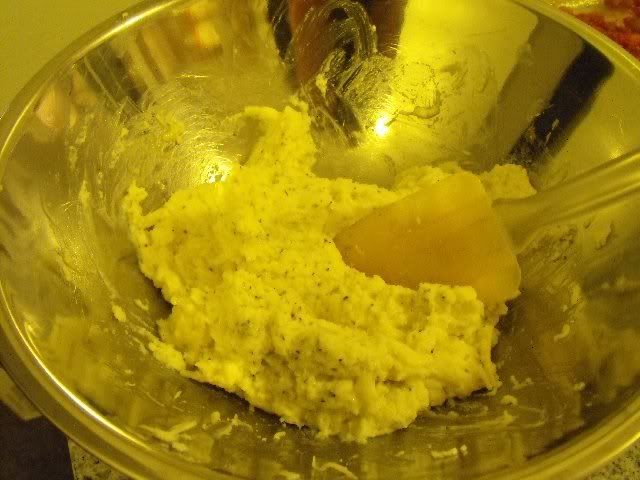
When you think you're ready, and you have a layer of sauce in the baking dish, go ahead and add the meat into the sauce. You want to do this after you've sauced the baking dish, because you really don't want the meat stuck to the bottom. You will want a layer of dried noodles, however.
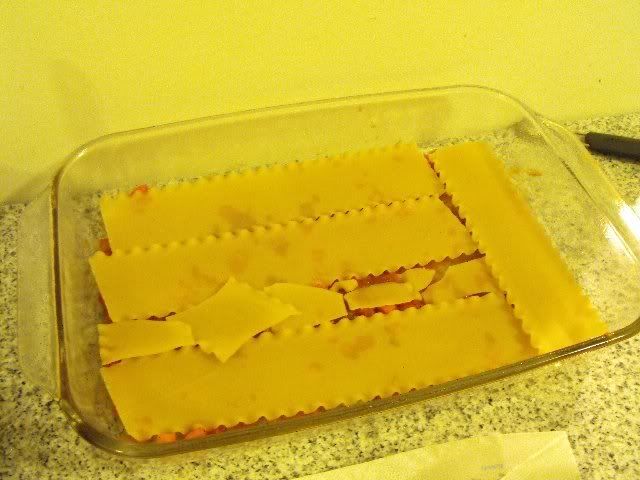
I love this part. Didja notice something about the pasta? Like the fact that we didn't blanch it first? So awesome. See, this is the beauty of lasagna: the moisture from the rest of the dish cooks the noodles for you. Okay, yeah, it'll add another 20 minutes of cooking time or so. But that's okay; the longer it cooks, the better the flavors marry. Your chances of soggy noodles will also decrease. Next up, add a layer of sauce.
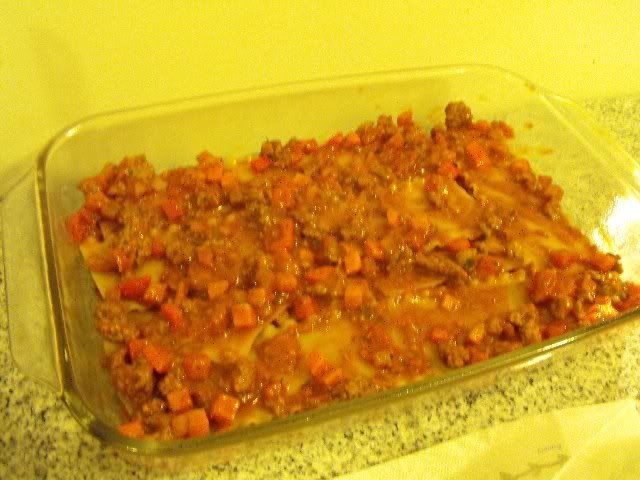
This part is actually trickier than it seems. You see, you're going to have four layers of noodles, with sauce layers on both sides. That means eight layers of sauce, and this is number two. The sauce is important: it's responsible for cooking the noodles. But as tricky as that step was, it doesn't compare to this one: add about a third of the cheese mixture. It's easiest if you dollop it in small increments and then spread it with a spatula.
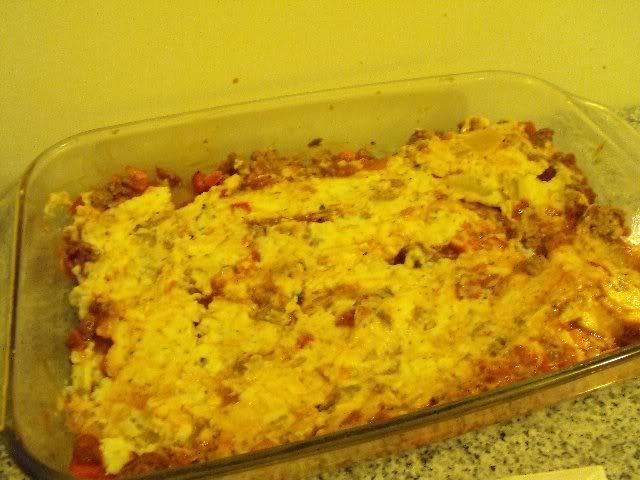
Oh man. You're going to hate me right about now, because it's time to add another tomato sauce layer. And then pasta, tomato sauce, cheese, tomato sauce, etc, until you have your top layer of pasta, and it's covered with sauce. Cover that layer with the last 1/4 lb of shredded mozzarella. Don't worry if it looks a little sparse. It'll be plenty.

Go ahead and sprinkle, really lightly, some Italian seasoning on top. Remember how I forgot the Parm in the cheese mixture? It may not be a bad idea to sprinkle a couple of Tablespoons on top as well. I'll let you add that to your own ingredient list. Now, go ahead and cover it with some aluminum foil. Try not to let the foil touch any of the cheese.
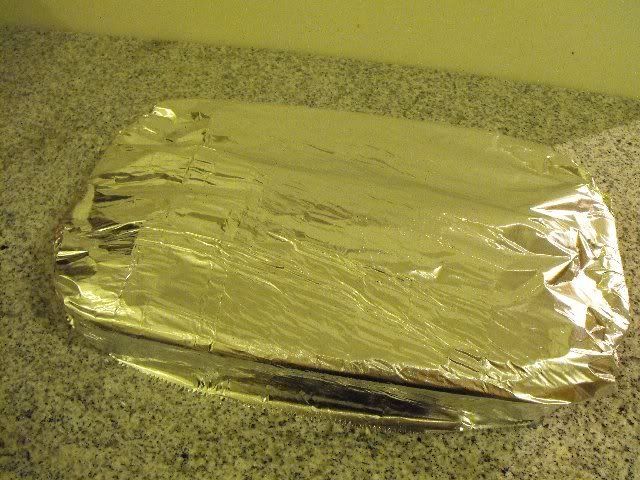
Slide that guy into your 350F oven and give it about 40 minutes. If you think about it, we're really only doing a couple of things here. We're not actually cooking the dish (except for the noodles) because the ingredients are already cooked. That's important to remember with casseroles. You're not cooking them, you're reheating them. Also, we're melting the cheese. But that part really happens at the end. At about 40 minutes, remove the foil and give the lasagna another 10 minutes to melt and maybe even brown the cheese a little.
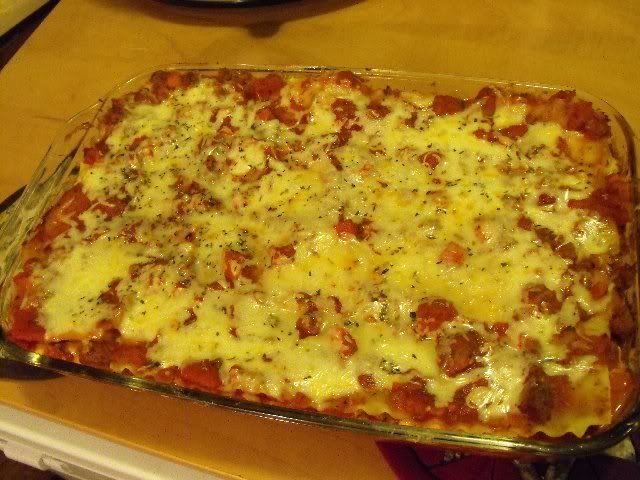
Oh man, doesn't that look good? Well, bad news. You can't touch it yet. I know it's going to be torture, but you need to recover it with foil and let it sit for another half hour. It's gotta have time to cool, and to finish cooking those noodles. If you were to serve it at this point, it would burn your tongue, and the noodles would be a little too al dente.
A few more points before I let you loose on this dish on your own. First of all, I cheated more on the cheese than I let on. For some reason, Monterrey Jack sounded really good that day, so I used that instead of mozz. In the past, I've also mixed Jack and Cheddar. And one of my all-time favorite lasagnas was dubbed "pain lasagna". Instead of tomato sauce, I used hot enchilada sauce. Instead of meat, I used black beans, pinto beans and corn. I didn't mix them into the sauce, I added them as their own layer underneath the cheese layer. Speaking of cheese, I went with hot pepper Jack and habanero Cheddar that time around. It was so good, it brought tears to my eyes. Actually, the tears were mostly from the pain, but the flavor was good too.
Lasagna has a lot of room for interpretation. At its most basic, it's little more than alternating layers of sauce, cheese and noodles. Beyond that, you're on your own.
Sunday, December 21, 2008
Screen for Beginners
Perhaps I got spoiled at the last couple of companies I was at, but I was shocked when I discovered that my new coworkers had never heard of screen, much less used it. In the past couple of years, I have found screen to be such a valuable program that I can't imagine life without it. I use it on a regular basis both at work and at home, partly because it's so handy and partly because I'm a nerd.
There are plenty of ways to use screen, but there are three things that I like to use it for:
* Maintaining a perisistent shell on one computer that I can access from multiple computers.
* Maintaining a perisistent development environment.
* Logging into somebody else's shell to monitor them, or demonstrate techniques to them.
Screen doesn't ship installed on every distribution, but it's easy to get installed:
RHEL/Fedora: yum install screen
Ubuntu: apt-get install screen
Once it's installed, it's easy to get running. Just type "screen" from the command prompt. The display will blank, and you'll be left at a prompt that looks just like the one you were just at. If you're doing thing in gnome-terminal, you might see something like [screen 0: bash] in your title bar.
At this point, you can use the command line exactly as you did before; you're really just running another shell. Go ahead and run top, to see what I mean. But now you have a series of commands available, each of which starts with CTRL-a. The first one you'll want to be familiar with is CTRL-a d (that's a CTRL-a followed by a d, not CTRL-a CTRL-d). This will detach from your screen session. When you do this, you'll find yourself at the command prompt that you were at before, with "[detached]" displayed above the prompt.
At this point, screen is running, but it's in the background. If you didn't exit out of top, then it is still actively running, you just can't see it. Go ahead and open a second terminal window and type in screen -r. This will reattach to the screen session, and you will see top still running.
That's enough to get you going for a basic persistent shell. I know a lot of people that do this on a server with a public IP address, to keep programs like Irssi open so that they can log into it from work or from home, without having to actually log out of their chat accounts. But let's take this a little further.
You should still have top running. Keep it open and type in CTRL-a c. This will create a second screen, with its own command prompt. Go ahead and type in free.
Now that you have two screens going, type CTRL-a p. This will switch to the previous screen, where top is running. Type CTRL-a n to go to the next screen, where free is running. You could also use CTRL-a 0 and CTRL-a 1 to go to a specific screen number. If you hit CTRL-a c again, you'll get yet another screen.
I've found this to be useful in maintaining a persistent development environment, so that I don't have to leave my notebook at work or close several instances of vim and bash at the end of the day. But let's look at one more feature of screen.
If your terminal is maximized, go ahead and resize it so that it only takes up half the screen. Hit CTRL-a 0 to make sure we're at the screen with top. No go ahead and open up another instance of gnome-terminal and maximize it. Type in screen -x at the prompt. You will see the top screen running, but it won't be taking up the whole window. That's because you've attached to a screen session that was already running somewhere else, and screen is using the display variables from that other screen.
Those of you who have ever tried to walk another user through something on the phone know what a pain it can be to not know exactly what the user is looking at. This can be especially troublesome when a command prompt in Linux is involved. Isn't it much easier to log into their machine, connect to their terminal, and then watch them work?
Now for some cleanup. Hit CTRL-a d to detach from this screen. Go back to the other terminal window where top is still running and hit q to quit. Type exit at the prompt to close that shell. Continue exiting out of screens, using the exit command. When you've exited out of the last command shell, you will be dropped back at your original shell, with the message "[screen is terminating]" above the prompt.
That should be plenty to get you running for now. When you're ready to get into some of the more advanced features of screen, go ahead and run man screen to take a look at the other options available.
There are plenty of ways to use screen, but there are three things that I like to use it for:
* Maintaining a perisistent shell on one computer that I can access from multiple computers.
* Maintaining a perisistent development environment.
* Logging into somebody else's shell to monitor them, or demonstrate techniques to them.
Screen doesn't ship installed on every distribution, but it's easy to get installed:
RHEL/Fedora: yum install screen
Ubuntu: apt-get install screen
Once it's installed, it's easy to get running. Just type "screen" from the command prompt. The display will blank, and you'll be left at a prompt that looks just like the one you were just at. If you're doing thing in gnome-terminal, you might see something like [screen 0: bash] in your title bar.
At this point, you can use the command line exactly as you did before; you're really just running another shell. Go ahead and run top, to see what I mean. But now you have a series of commands available, each of which starts with CTRL-a. The first one you'll want to be familiar with is CTRL-a d (that's a CTRL-a followed by a d, not CTRL-a CTRL-d). This will detach from your screen session. When you do this, you'll find yourself at the command prompt that you were at before, with "[detached]" displayed above the prompt.
At this point, screen is running, but it's in the background. If you didn't exit out of top, then it is still actively running, you just can't see it. Go ahead and open a second terminal window and type in screen -r. This will reattach to the screen session, and you will see top still running.
That's enough to get you going for a basic persistent shell. I know a lot of people that do this on a server with a public IP address, to keep programs like Irssi open so that they can log into it from work or from home, without having to actually log out of their chat accounts. But let's take this a little further.
You should still have top running. Keep it open and type in CTRL-a c. This will create a second screen, with its own command prompt. Go ahead and type in free.
Now that you have two screens going, type CTRL-a p. This will switch to the previous screen, where top is running. Type CTRL-a n to go to the next screen, where free is running. You could also use CTRL-a 0 and CTRL-a 1 to go to a specific screen number. If you hit CTRL-a c again, you'll get yet another screen.
I've found this to be useful in maintaining a persistent development environment, so that I don't have to leave my notebook at work or close several instances of vim and bash at the end of the day. But let's look at one more feature of screen.
If your terminal is maximized, go ahead and resize it so that it only takes up half the screen. Hit CTRL-a 0 to make sure we're at the screen with top. No go ahead and open up another instance of gnome-terminal and maximize it. Type in screen -x at the prompt. You will see the top screen running, but it won't be taking up the whole window. That's because you've attached to a screen session that was already running somewhere else, and screen is using the display variables from that other screen.
Those of you who have ever tried to walk another user through something on the phone know what a pain it can be to not know exactly what the user is looking at. This can be especially troublesome when a command prompt in Linux is involved. Isn't it much easier to log into their machine, connect to their terminal, and then watch them work?
Now for some cleanup. Hit CTRL-a d to detach from this screen. Go back to the other terminal window where top is still running and hit q to quit. Type exit at the prompt to close that shell. Continue exiting out of screens, using the exit command. When you've exited out of the last command shell, you will be dropped back at your original shell, with the message "[screen is terminating]" above the prompt.
That should be plenty to get you running for now. When you're ready to get into some of the more advanced features of screen, go ahead and run man screen to take a look at the other options available.
Sunday, December 7, 2008
Turducken
Well, I pulled it off: turducken. This is the sort of dish that you learn a lot from while making it. Of course, I learned a few things the hard way. The first lesson that I learned the hard way was to read the instructions from all of my turducken recipes a little more carefully. It's not like baking where you can say, "this is a muffin recipe, that means I can use the muffin method." There's more to the technique.
The idea with a turducken is to remove all of the bones from a chicken and a duck, and most of the bones from a turkey, and stuff the chicken inside the duck, and the duck inside the turkey. Traditionally, there would be stuffing between each bird as well. As it turns out, removing most of the bones from the turkey isn't difficult, so long as you leave the skin on. Doing the same for a chicken and a duck was far more difficult, especially since we decided to remove the skin.
What we ultimately ended up with were a boneless, skinless chicken and duck, quartered. Because we tried to keep it from being quartered, it took much longer than it would have if we had just quartered it properly in the first place. Now, I'm not saying that this is the correct way to make turducken. It's just the way that we ended up with.
Bearing that in mind, let's go through the steps after we deboned all of the birds. With the turkey, you don't have to remove the bones from the wings or the drumsticks; you just have to remove the bones from the body. This isn't bad, and it leaves you with what is essentially a butterflied turkey.
Before you even started the process of deboning these birds, I hope you made some stuffing to stick inside of them. The stuffing should be cooling to room temperature while you debone the birds. We ended up using about 6 cups total. Try to make it a little drier than usual; part of its job is to soak up juices. Go ahead and put down a layer of fully coolled stuffing.
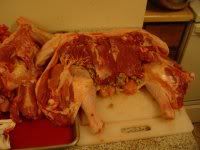
Next up comes the duck. Lay down the duck breast in the middle, and the rest of the meat on the side.
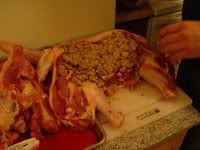
Give it another layer of stuffing.
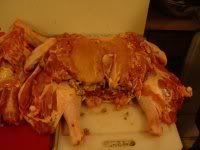
And then follow up with the chicken, breast in the middle, rest of the meat on the outside.
This is where you use up the last of the stuffing. Don't feel like you have to use it all. The birds are going to be plenty hard to close up anyway, and more stuffing will just make it more difficult.
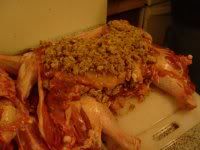
This part will be interesting. You need to close up the bird, and then keep it closed. At first, this doesn't seem so difficult.
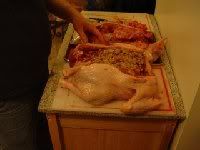
But you'll find that keeping it all together is going to be rough. It'll help to have a second person helping out here, because they'll need to hold the turkey closed while you thread a couple of skewers through the skin.
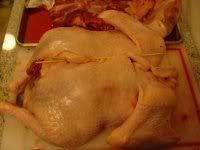
Next up, roll the turkey over on top of the seam, and move it to a baking pan. You probably can't see it with my baking pan, but I have a rack in the bottom. Also, I would liked to have tied the legs back together, but I couldn't find my butchers twine.
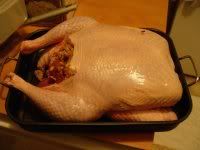
Believe it or not, I think this next part was actually more difficult than building the bird. We had to cook it. We didn't cook it right away, actually. We covered it and put it in the fridge, to cook the next day. We pulled it from the fridge at the same time we started pre-heating the oven, with the hopes that it would come somewhat closer to room temp by the time we stuck it in the oven.
I prepared for this event by watching Alton Brown cook several turkeys, both on Good Eats and on Food Network "All-Star" holiday specials. Stuffing or no, there was always one constant: he did the majority of cooking at 350F. He stated at least once that lower, slower cooking times would contribute to drying out the bird. He also would tend to start the bird at a higher temp, to get some browning going, and then liked to put a foil shield over the breast to keep it from overcooking.
I started by giving the bird a spritz of cooking spray. I knew the oil would aid in proper browning, and that's important. I also fashioned a triangle-shaped shield of foil to cover the breast, before I put it in the oven. The shield would be added later.
I started the cooking process at 400F, to get some decent browning on the bird. Once it looked presentable, I covered the breast with the foil shield and put it back in the oven, at 350F. Since I have also misplaced by probe thermometer, I had to check the internal temp with an instant-read thermometer. My goal was the high 150s, since I knew that carry-over cooking would take it to 165F on the way to my dad's house.
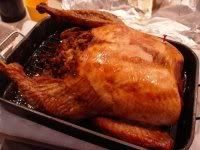
Total cooking time was about 3 hours. Somewhere around the 2 1/2 hour mark, I started to chicken out (no pun intended) and drop the oven temp. It eventually came down to maybe 310F or so. I'm still not convinced this was the right action. When the bird was just shy of 160F, I pulled out and covered it completely with foil. Before I covered it, it looked like this:
When we got it to my dad's house, we let everyone see it before carving it. Then we set about carving it, which should have been a simple task. Since all of the bones are removed from the inside, we should have just been able to cut cross-sections. But since some of the outer bones remained, they initially got in our way. Eventually, I was able to come up with a good cross-section.
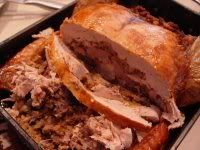
Yes, the meat looks a little dry, doesn't it? This probably has to do with my lowering the oven temp, and/or having to open the oven repeatedly to check the temp, since I didn't have a probe thermometer. Fortunately, it wasn't too dry. Just a tad.
I carved up the whole thing, and moved it all to a platter. I kept the drumsticks intact, but laid out the rest in easy-to-serve pieces, nicely garnished with all of the stuffing.
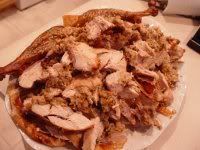
I noticed that the duck was not a gamey as it usually is. I don't know whether this is because it had chicken and turkey juices mixed in with it, or because it was fully-cooked, instead of medium-rare as duck is normally served. I imaging it's a combination of both, but mostly the second. The chicken was decently cooked. Nobody got sick from undercooked stuffing. All in all, I think it turned out better than expected, but it certainly wasn't a professional job. I think next time we do a turducken, I might just order one premade from The South (tm) and see how they did theirs. Still, not a bad first try.
The idea with a turducken is to remove all of the bones from a chicken and a duck, and most of the bones from a turkey, and stuff the chicken inside the duck, and the duck inside the turkey. Traditionally, there would be stuffing between each bird as well. As it turns out, removing most of the bones from the turkey isn't difficult, so long as you leave the skin on. Doing the same for a chicken and a duck was far more difficult, especially since we decided to remove the skin.
What we ultimately ended up with were a boneless, skinless chicken and duck, quartered. Because we tried to keep it from being quartered, it took much longer than it would have if we had just quartered it properly in the first place. Now, I'm not saying that this is the correct way to make turducken. It's just the way that we ended up with.
Bearing that in mind, let's go through the steps after we deboned all of the birds. With the turkey, you don't have to remove the bones from the wings or the drumsticks; you just have to remove the bones from the body. This isn't bad, and it leaves you with what is essentially a butterflied turkey.
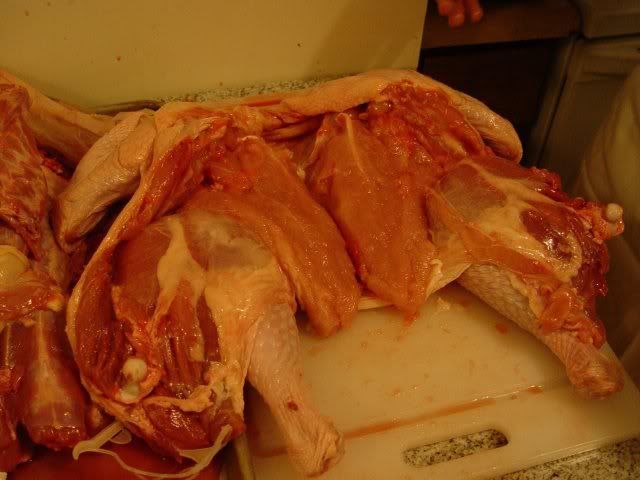
Before you even started the process of deboning these birds, I hope you made some stuffing to stick inside of them. The stuffing should be cooling to room temperature while you debone the birds. We ended up using about 6 cups total. Try to make it a little drier than usual; part of its job is to soak up juices. Go ahead and put down a layer of fully coolled stuffing.

Next up comes the duck. Lay down the duck breast in the middle, and the rest of the meat on the side.

Give it another layer of stuffing.
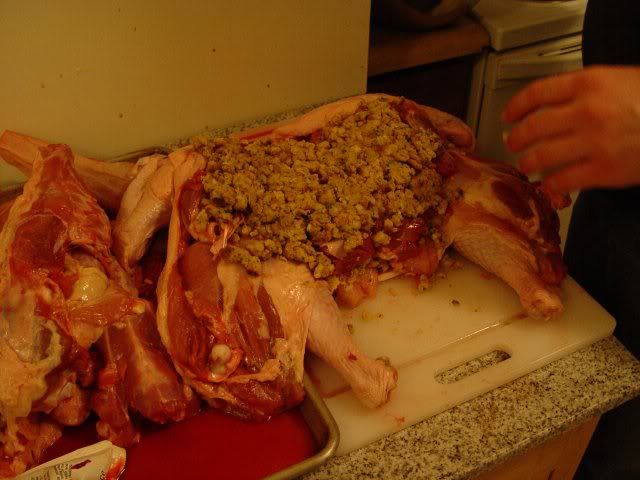
And then follow up with the chicken, breast in the middle, rest of the meat on the outside.

This is where you use up the last of the stuffing. Don't feel like you have to use it all. The birds are going to be plenty hard to close up anyway, and more stuffing will just make it more difficult.
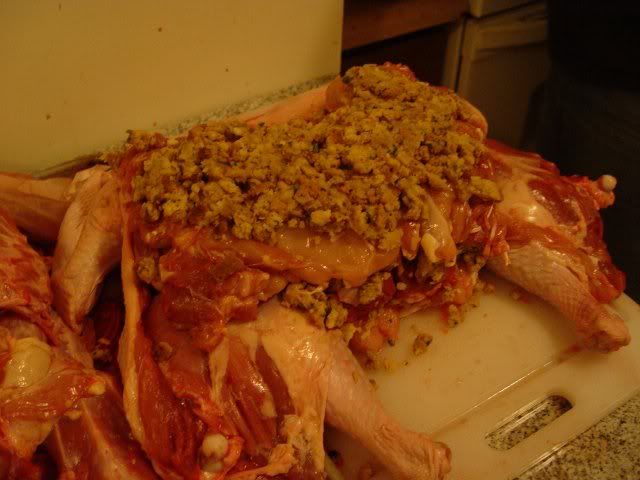
This part will be interesting. You need to close up the bird, and then keep it closed. At first, this doesn't seem so difficult.
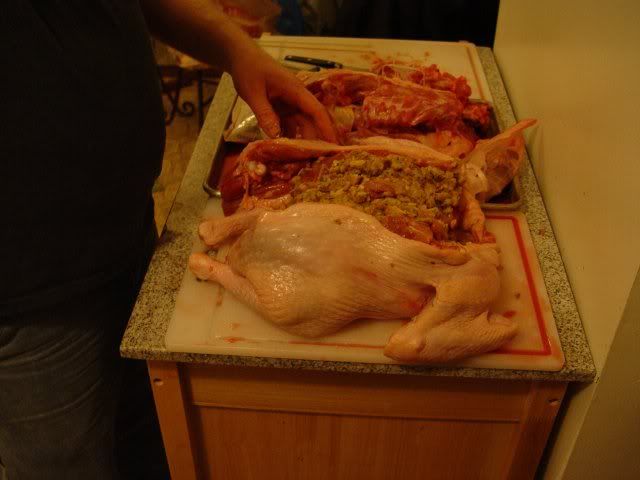
But you'll find that keeping it all together is going to be rough. It'll help to have a second person helping out here, because they'll need to hold the turkey closed while you thread a couple of skewers through the skin.
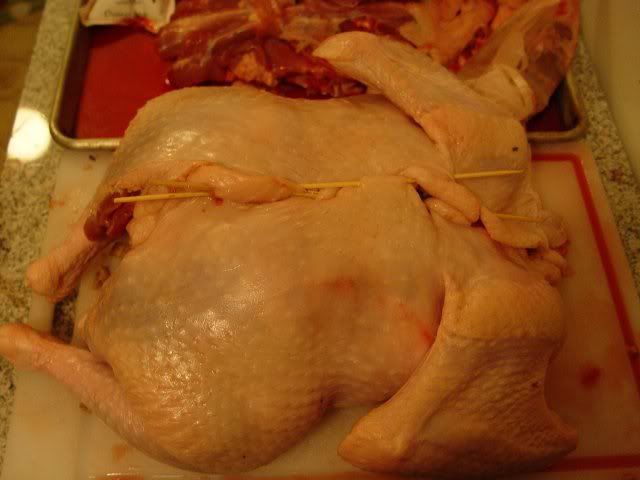
Next up, roll the turkey over on top of the seam, and move it to a baking pan. You probably can't see it with my baking pan, but I have a rack in the bottom. Also, I would liked to have tied the legs back together, but I couldn't find my butchers twine.
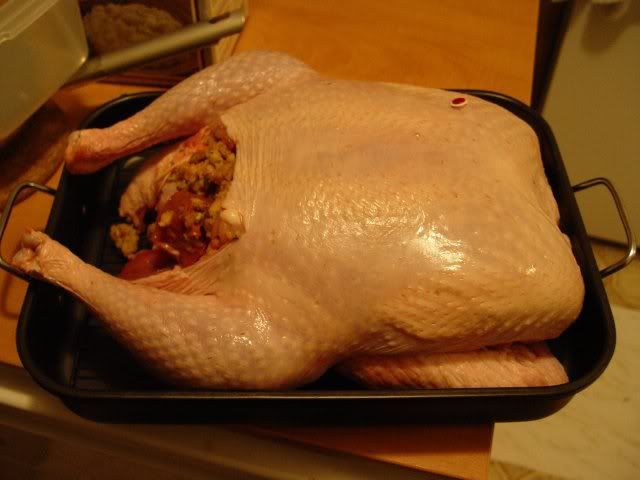
Believe it or not, I think this next part was actually more difficult than building the bird. We had to cook it. We didn't cook it right away, actually. We covered it and put it in the fridge, to cook the next day. We pulled it from the fridge at the same time we started pre-heating the oven, with the hopes that it would come somewhat closer to room temp by the time we stuck it in the oven.
I prepared for this event by watching Alton Brown cook several turkeys, both on Good Eats and on Food Network "All-Star" holiday specials. Stuffing or no, there was always one constant: he did the majority of cooking at 350F. He stated at least once that lower, slower cooking times would contribute to drying out the bird. He also would tend to start the bird at a higher temp, to get some browning going, and then liked to put a foil shield over the breast to keep it from overcooking.
I started by giving the bird a spritz of cooking spray. I knew the oil would aid in proper browning, and that's important. I also fashioned a triangle-shaped shield of foil to cover the breast, before I put it in the oven. The shield would be added later.
I started the cooking process at 400F, to get some decent browning on the bird. Once it looked presentable, I covered the breast with the foil shield and put it back in the oven, at 350F. Since I have also misplaced by probe thermometer, I had to check the internal temp with an instant-read thermometer. My goal was the high 150s, since I knew that carry-over cooking would take it to 165F on the way to my dad's house.
Total cooking time was about 3 hours. Somewhere around the 2 1/2 hour mark, I started to chicken out (no pun intended) and drop the oven temp. It eventually came down to maybe 310F or so. I'm still not convinced this was the right action. When the bird was just shy of 160F, I pulled out and covered it completely with foil. Before I covered it, it looked like this:
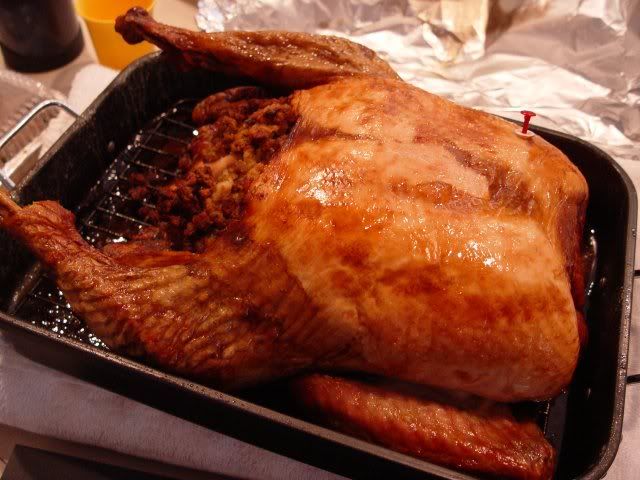
When we got it to my dad's house, we let everyone see it before carving it. Then we set about carving it, which should have been a simple task. Since all of the bones are removed from the inside, we should have just been able to cut cross-sections. But since some of the outer bones remained, they initially got in our way. Eventually, I was able to come up with a good cross-section.
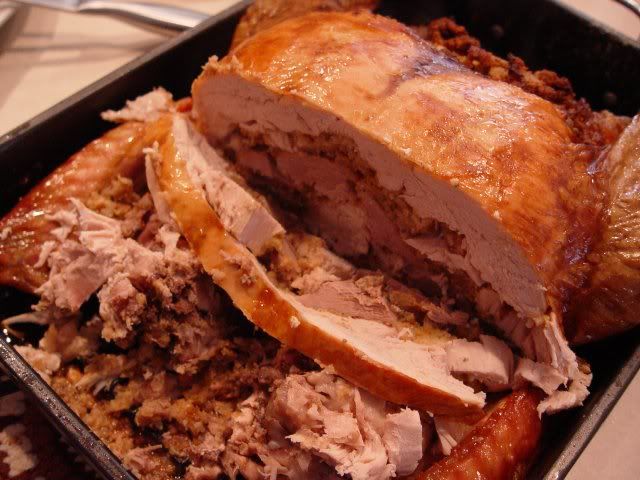
Yes, the meat looks a little dry, doesn't it? This probably has to do with my lowering the oven temp, and/or having to open the oven repeatedly to check the temp, since I didn't have a probe thermometer. Fortunately, it wasn't too dry. Just a tad.
I carved up the whole thing, and moved it all to a platter. I kept the drumsticks intact, but laid out the rest in easy-to-serve pieces, nicely garnished with all of the stuffing.
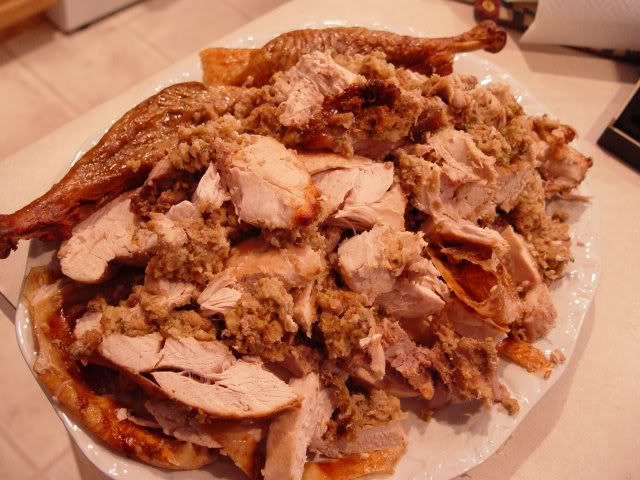
I noticed that the duck was not a gamey as it usually is. I don't know whether this is because it had chicken and turkey juices mixed in with it, or because it was fully-cooked, instead of medium-rare as duck is normally served. I imaging it's a combination of both, but mostly the second. The chicken was decently cooked. Nobody got sick from undercooked stuffing. All in all, I think it turned out better than expected, but it certainly wasn't a professional job. I think next time we do a turducken, I might just order one premade from The South (tm) and see how they did theirs. Still, not a bad first try.
Monday, December 1, 2008
Tutorial: Baklava
I made some baklava a couple of weeks ago, as a bribe to get my boss to send me to San Francisco. The deal was, if they send me to SF, then the business day immediately following my return, I would bring homemade baklava to work with me.
A few days after presenting my offer, I was presented with my itinerary. Upon my return I picked up some ingredients, got the camera ready, and put together the first baklava that I had made since starting this blog.
I'll admit, baklava looks like a scary thing to make. And unfortunately, few people that make it do it right. Almost every baklava I've ever had has been either too dry or too soggy, and they've also generally been sickeningly sweet. My baklava, as I promised to my boss, is different. It's not too sweet, dry or soggy. It's also not incredibly traditional. Well, screw tradition, I say! This is a dang good baklava!
You may recall a couple of years ago when I make some phyllo cups. If you can handle those, this shouldn't be a problem. You may also want to brush up on making clarified butter. First, the cast of ingredients (a la The Pioneer Woman):

Ingredients
Sugar/Spice Mixture:
1/2 cup sugar
1 tsp cinnamon
1 tsp nutmeg
1/2 tsp cloves
1/2 tsp allspice
Simple Syrup:
3/4 cup sugar
1/4 cup honey
1/4 cup water
juice of half a lemon
juice of half an orange
zest of a lemon
zest of an orange
2 cinnamon sticks, broken in half
6 whole cloves
The Rest of the Baklava:
1 cup pistachios
1 cup pecans
3/4 cup sliced almonds
1/4 to 1/2 lb clarified butter
20 sheets (1/2 lb or 1/2 a box) phyllo dough
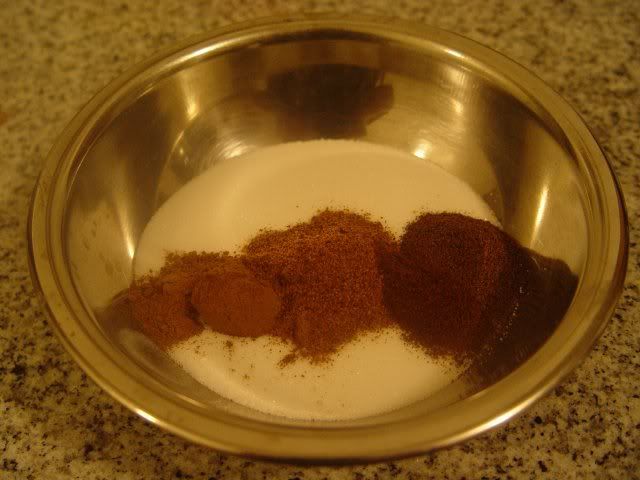
To start off, you'll need a few spices, mixed in with some sugar. This is kind of a high-end cinnamon sugar that you can sprinkle later on your toast. In fact, you'll have some left over for that, so make good use of it.
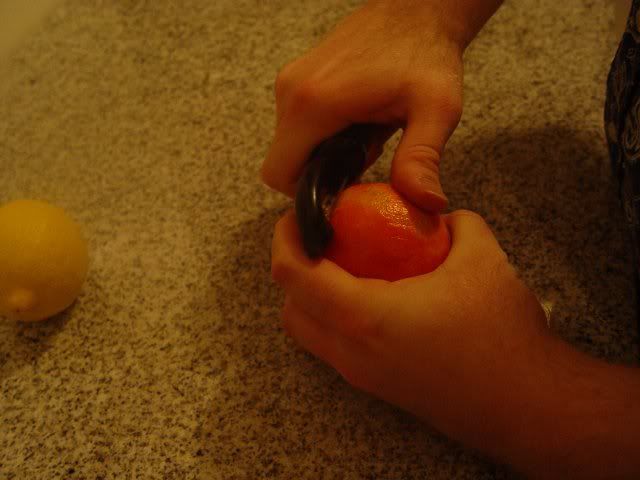
This is also not a bad time to get together the ingredients for a simple syrup. The hardest part is getting some lemon and orange zest ready. Don't bother with a microplane grater on this one; just use a vegetable peeler.
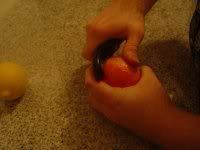
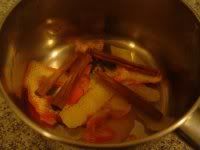
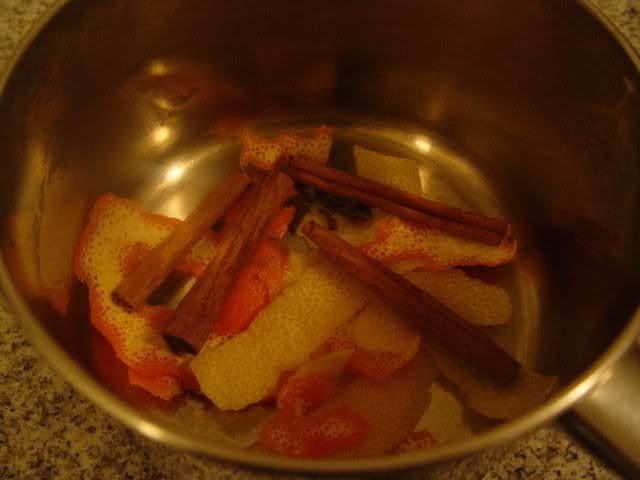
Go ahead and toss the zest in a sauce pan, along with some sugar, honey, water, orange and lemon juice, and whole spices. You can set those aside for now.
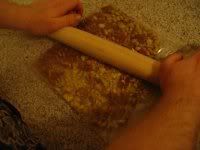
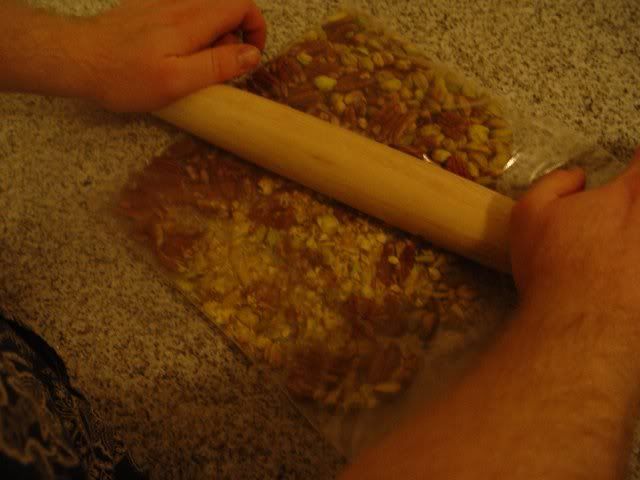
Next up, you'll need some nuts. I went with pistachios, pecans and almonds. You can either pulse them in a food processor, or do what I always do and toss them into a zip-top bag and roll them with a rolling pin. The texture is inconsistent, which I actually kind of like.
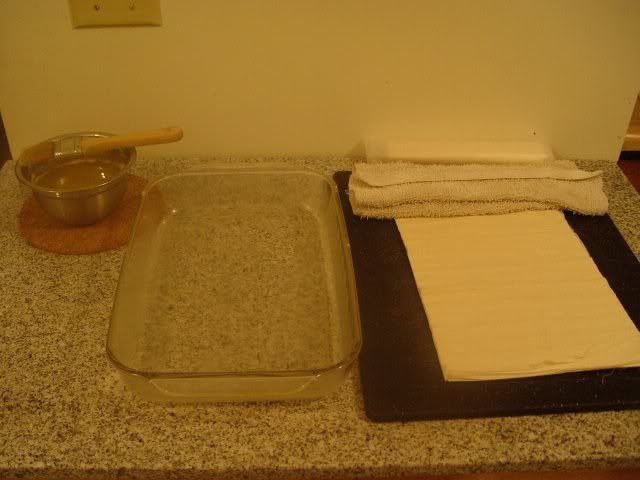
Now that you have those things out of the way, it's time to move onto the fun stuff: the phyllo dough. You'll want 20 sheets (half a box) of phyllo dough, a stick or two of clarified butter, a 13 x 9 baking dish brushed with clarified butter, and a kitchen towel that is just barely damp.
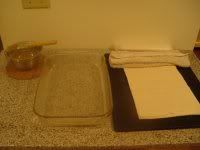
The towel is to keep the phyllo from drying out while you're working with it. Just between you and me, I don't really use it. I've been working with phyllo for so long that I'm fast enough to go through half a package (that's one whole baklava) without needing it. You'll get there, don't worry. Now go ahead and lay out a sheet of phyllo and brush it with clarified butter.
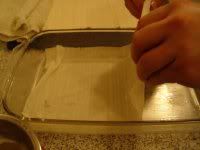
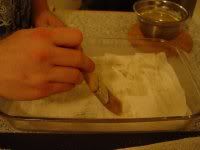
Repeat until you have 6 sheets laid down. Then go ahead and divide up the nuts into thirds, and sprinkle one third onto the phyllo.
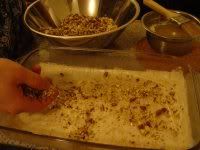
Follow up with a sprinkling of the spice/sugar mixture. I moved mine into a leftover spice jar, to make it easier to sprinkle evenly, and to keep it later for toast. Don't feel like you have to use it all. You just want a thin layer, barely capable of even being called a layer.
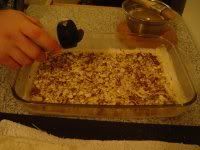
Go ahead and lay down another sheet of phyllo and brush with clarified butter. Go easy on this one, since there's a layer of nuts underneath waiting to tear holes in your phyllo. Just between you and me, if you think this part is going to be too hard, feel free to lay out another cutting board and do your layers of phyllo on that, and then move the layers of phyllo on top of the nuts. You'll want four sheets of phyllo on this layer.
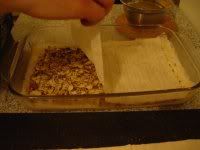
Keep going until you have three layers of nuts and four layers of phyllo. The top and bottom layers should be 6 sheets each, and the inner layers should be 4 sheets each. When it's all finished, go ahead and cut it into squares, and then cut the squares into triangles.

Toss it in a 350F oven for about half an hour. While it's baking, you need to cook up the simple syrup. Bring it to a boil, then drop it to a simmer until the baklava comes out of the oven.
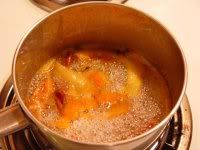
Pull the baklava when it reaches a golden-brown color. Mine actually was a little darker than it shows in the photos. Just be careful not to burn it.
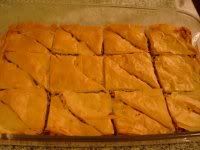
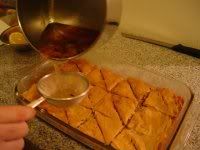
Go ahead and pull the large bits (zest and cinnamon) out of the simple syrup with a pair of tongs. Don't worry about the smaller bits, we're going to strain them out. In fact, you might as well just strain them out onto the baklava. The syrup is hot and the pan is hot, so there will be some sizzling. The sizzling will continue for at least a couple of minutes.
Make sure you wait until the baklava cools down before you try serving it. In fact, if you can manage to wait a couple of days, it will actually get even better. At the very least, you should wait overnight. Me, I waited until the sugar was cooled enough not to burn me.
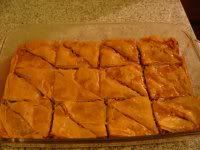
The reviews on this were excellent. I had a couple of coworkers that had previously told me that they hated baklava, tell me that they were now convinced that I was the only person in the world that could actually make good baklava. Several people told me that it definitely wasn't traditional, and everyone liked that it wasn't too sweet. It was a hit with everyone who tried it.
A few days after presenting my offer, I was presented with my itinerary. Upon my return I picked up some ingredients, got the camera ready, and put together the first baklava that I had made since starting this blog.
I'll admit, baklava looks like a scary thing to make. And unfortunately, few people that make it do it right. Almost every baklava I've ever had has been either too dry or too soggy, and they've also generally been sickeningly sweet. My baklava, as I promised to my boss, is different. It's not too sweet, dry or soggy. It's also not incredibly traditional. Well, screw tradition, I say! This is a dang good baklava!
You may recall a couple of years ago when I make some phyllo cups. If you can handle those, this shouldn't be a problem. You may also want to brush up on making clarified butter. First, the cast of ingredients (a la The Pioneer Woman):
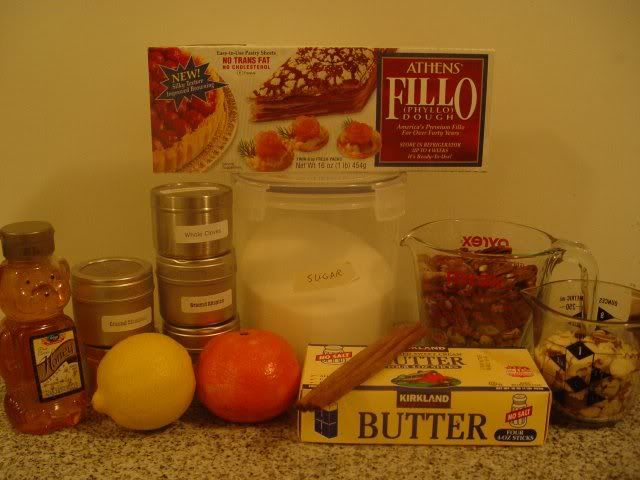
Ingredients
Sugar/Spice Mixture:
1/2 cup sugar
1 tsp cinnamon
1 tsp nutmeg
1/2 tsp cloves
1/2 tsp allspice
Simple Syrup:
3/4 cup sugar
1/4 cup honey
1/4 cup water
juice of half a lemon
juice of half an orange
zest of a lemon
zest of an orange
2 cinnamon sticks, broken in half
6 whole cloves
The Rest of the Baklava:
1 cup pistachios
1 cup pecans
3/4 cup sliced almonds
1/4 to 1/2 lb clarified butter
20 sheets (1/2 lb or 1/2 a box) phyllo dough
To start off, you'll need a few spices, mixed in with some sugar. This is kind of a high-end cinnamon sugar that you can sprinkle later on your toast. In fact, you'll have some left over for that, so make good use of it.
This is also not a bad time to get together the ingredients for a simple syrup. The hardest part is getting some lemon and orange zest ready. Don't bother with a microplane grater on this one; just use a vegetable peeler.
Go ahead and toss the zest in a sauce pan, along with some sugar, honey, water, orange and lemon juice, and whole spices. You can set those aside for now.
Next up, you'll need some nuts. I went with pistachios, pecans and almonds. You can either pulse them in a food processor, or do what I always do and toss them into a zip-top bag and roll them with a rolling pin. The texture is inconsistent, which I actually kind of like.
Now that you have those things out of the way, it's time to move onto the fun stuff: the phyllo dough. You'll want 20 sheets (half a box) of phyllo dough, a stick or two of clarified butter, a 13 x 9 baking dish brushed with clarified butter, and a kitchen towel that is just barely damp.
The towel is to keep the phyllo from drying out while you're working with it. Just between you and me, I don't really use it. I've been working with phyllo for so long that I'm fast enough to go through half a package (that's one whole baklava) without needing it. You'll get there, don't worry. Now go ahead and lay out a sheet of phyllo and brush it with clarified butter.
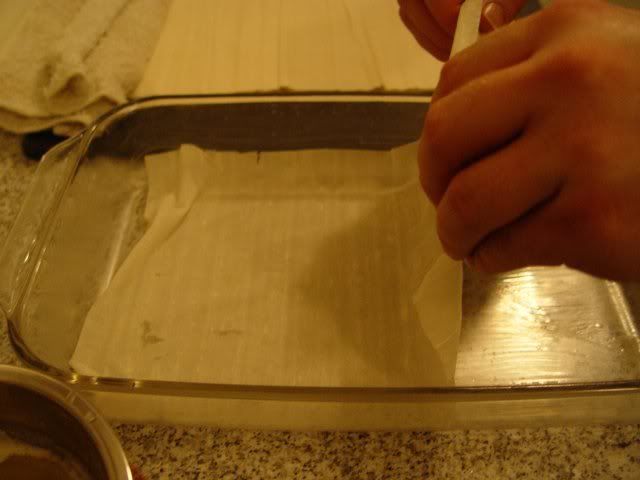
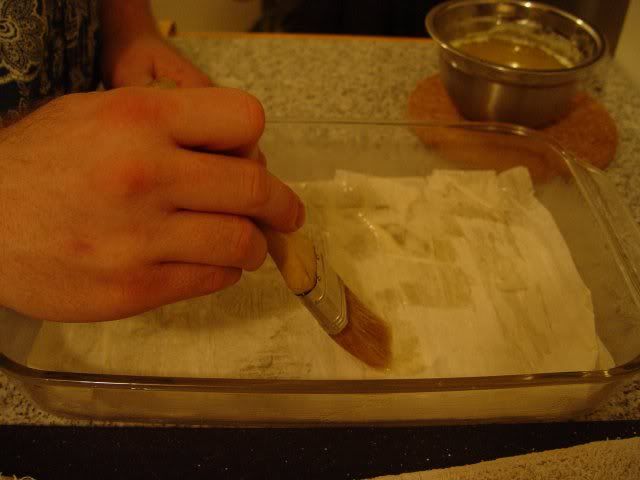
Repeat until you have 6 sheets laid down. Then go ahead and divide up the nuts into thirds, and sprinkle one third onto the phyllo.
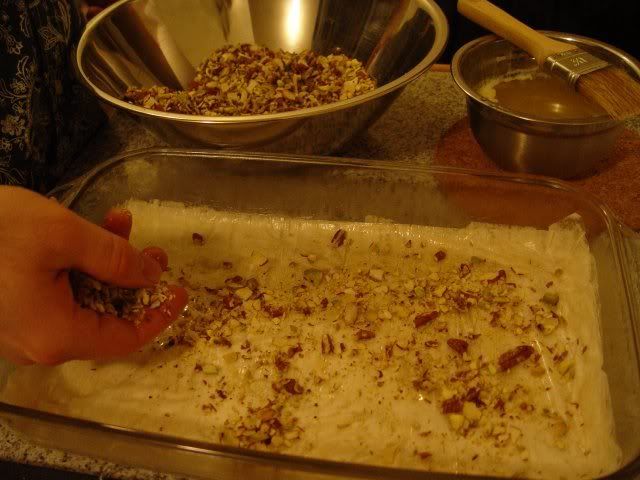
Follow up with a sprinkling of the spice/sugar mixture. I moved mine into a leftover spice jar, to make it easier to sprinkle evenly, and to keep it later for toast. Don't feel like you have to use it all. You just want a thin layer, barely capable of even being called a layer.
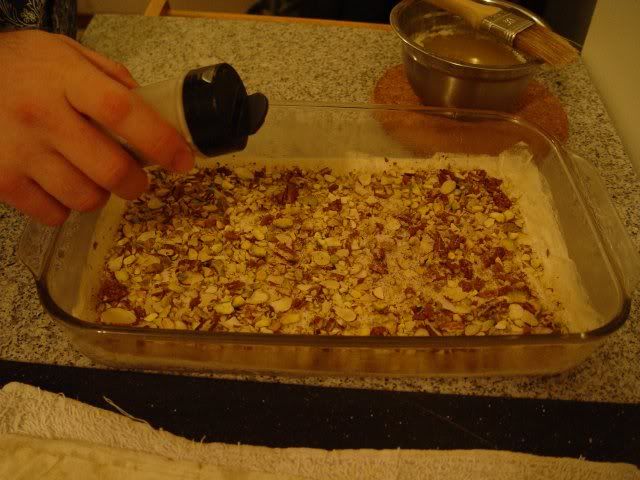
Go ahead and lay down another sheet of phyllo and brush with clarified butter. Go easy on this one, since there's a layer of nuts underneath waiting to tear holes in your phyllo. Just between you and me, if you think this part is going to be too hard, feel free to lay out another cutting board and do your layers of phyllo on that, and then move the layers of phyllo on top of the nuts. You'll want four sheets of phyllo on this layer.

Keep going until you have three layers of nuts and four layers of phyllo. The top and bottom layers should be 6 sheets each, and the inner layers should be 4 sheets each. When it's all finished, go ahead and cut it into squares, and then cut the squares into triangles.

Toss it in a 350F oven for about half an hour. While it's baking, you need to cook up the simple syrup. Bring it to a boil, then drop it to a simmer until the baklava comes out of the oven.
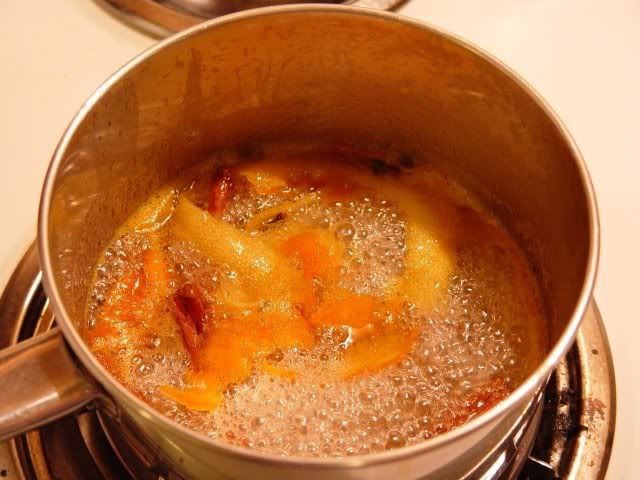
Pull the baklava when it reaches a golden-brown color. Mine actually was a little darker than it shows in the photos. Just be careful not to burn it.
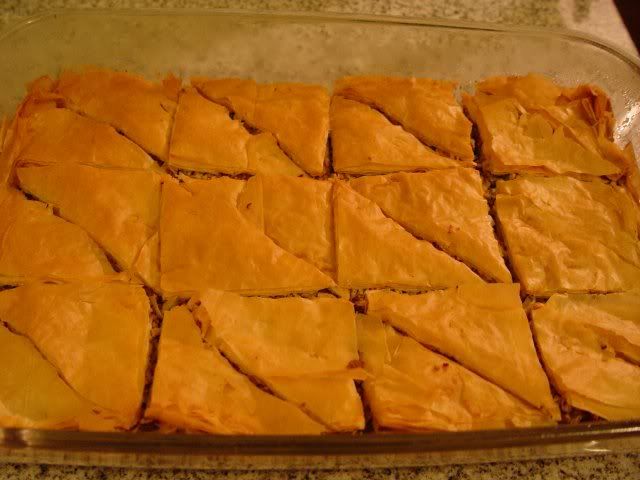
Go ahead and pull the large bits (zest and cinnamon) out of the simple syrup with a pair of tongs. Don't worry about the smaller bits, we're going to strain them out. In fact, you might as well just strain them out onto the baklava. The syrup is hot and the pan is hot, so there will be some sizzling. The sizzling will continue for at least a couple of minutes.

Make sure you wait until the baklava cools down before you try serving it. In fact, if you can manage to wait a couple of days, it will actually get even better. At the very least, you should wait overnight. Me, I waited until the sugar was cooled enough not to burn me.
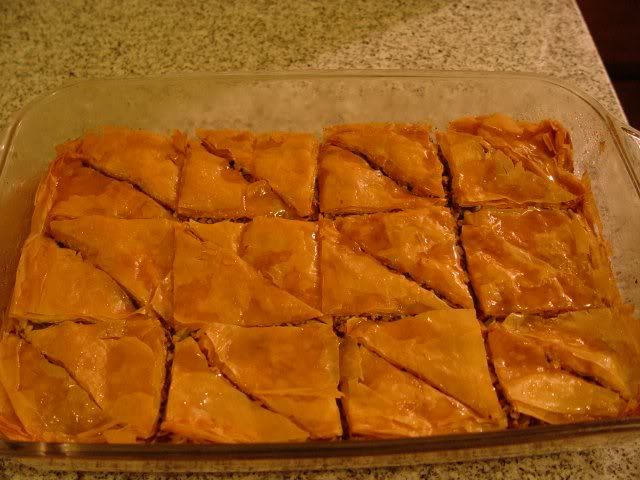
The reviews on this were excellent. I had a couple of coworkers that had previously told me that they hated baklava, tell me that they were now convinced that I was the only person in the world that could actually make good baklava. Several people told me that it definitely wasn't traditional, and everyone liked that it wasn't too sweet. It was a hit with everyone who tried it.
Sunday, November 30, 2008
Condensed Pain
My intention was actually to make another spice blend that I call the Deathcrier, but I was playing around with a few things, and it kind of went in a different direction.
Usually, I mix together whole spices with pre-ground spices, because that's just what I usually have laying around. This time I had whole versions of everything, so I went for it. I also decided to try grinding everything up in my little 2-cup food processor instead of the coffee grinder that I usually use, so that I could make a little more.
Things didn't go as well as I'd hoped. I wanted more heat, so I upped the amount of habaneros. I also discovered that my food processor was good for getting the chiles and spices small enough to fit into a pepper grinder, but not small enough to be called a powder. After 10 to 15 minutes of my fruitless efforts, I eventually gave up and pulled out the coffee grinder. It took 3 batches, but each batch took less than 20 seconds.
At some point, I got some chile in my eye. I got it rinsed out okay, painful though it was for a few minutes. Unfortunately, the water mixing with the chile powder that had gotten on the rest of the left side of my face made half of my face feel like it was on fire. When I finally tasted the chile powder, my mouth was in immediate pain. The first set of words that hit my brain were, "condensed pain". I like it.
Recommended hardware: painters mask, protective goggles for the eyes, rubber gloves, coffee grinder.
Condensed Pain
2 whole New Mexico chiles
3 whole guajillo chiles
6 whole chiles de Arbol
6 whole Japones chiles
3 whole chipotles
12 whole habaneros
1 Tbsp whole all-spice
2 tsp minced dried garlic
1 Tbsp chopped dried onion
1 Tbsp whole achiote
2 tsp whole coriander seed
1 tsp whole cumin seed
1 Tbsp whole black pepper
Usually, I mix together whole spices with pre-ground spices, because that's just what I usually have laying around. This time I had whole versions of everything, so I went for it. I also decided to try grinding everything up in my little 2-cup food processor instead of the coffee grinder that I usually use, so that I could make a little more.
Things didn't go as well as I'd hoped. I wanted more heat, so I upped the amount of habaneros. I also discovered that my food processor was good for getting the chiles and spices small enough to fit into a pepper grinder, but not small enough to be called a powder. After 10 to 15 minutes of my fruitless efforts, I eventually gave up and pulled out the coffee grinder. It took 3 batches, but each batch took less than 20 seconds.
At some point, I got some chile in my eye. I got it rinsed out okay, painful though it was for a few minutes. Unfortunately, the water mixing with the chile powder that had gotten on the rest of the left side of my face made half of my face feel like it was on fire. When I finally tasted the chile powder, my mouth was in immediate pain. The first set of words that hit my brain were, "condensed pain". I like it.
Recommended hardware: painters mask, protective goggles for the eyes, rubber gloves, coffee grinder.
Condensed Pain
2 whole New Mexico chiles
3 whole guajillo chiles
6 whole chiles de Arbol
6 whole Japones chiles
3 whole chipotles
12 whole habaneros
1 Tbsp whole all-spice
2 tsp minced dried garlic
1 Tbsp chopped dried onion
1 Tbsp whole achiote
2 tsp whole coriander seed
1 tsp whole cumin seed
1 Tbsp whole black pepper
Sunday, November 23, 2008
Utah Chocolate Show 2008 Report
Well, another chocolate show has come and gone. Even though I've known about this one for months, I still felt like it caught be off-guard. I heard nothing about it from anyone, I just had to keep watching the site, when I remembered. Fortunately, I remembered a few days before the show, and did not miss it. I also only managed to show up for one afternoon, unlike other years where I spent a couple of days there.
I've gotta say, my experience was marred before I even got in the building. I don't know who thought it would be a good idea to do the Gun Show at the same time, but the Sandy Expo Center's parking lot isn't even big enough for one show at a time, much less two. The scary part is, it looked like there was an entire other exhibition hall available, but I could be wrong. The Gun Show might have extended it into it, and I would never have known, because I was only interested in the chocolate.
The show was a little smaller this year than in years past. I attribute this to two things: the wonky economy, and the University of Utah vs BYU game. Sometime around the late afternoon, many of the spectators took off to watch BYU take a thrashing from the Utes. I took off not too long after that, knowing that traffic would be light while everyone was at The Game.
There were a few stars at this year's show that you should know about. As always, Knight Family Honey was around with their amazing honey that comes from (so they told me) a pumpkin field surrounded by an alfalfa field. Okay, so it's not chocolate, but I don't mind. it's fresh, it's raw, and it's darned tasty. Keep in mind, this is coming from somebody that usually doesn't care for honey or its bitter aftertaste. This year they also had honey taffy which was decent, but tasted nothing like honey to me. Still, I liked it and have been snacking on it all day. I have a jar of honey from them too, and I may break that out for a baklava or something.
Tony Caputo's had a booth again this year, and I was glad for it. I'd wondered if Matt Caputo would recognize me, since I haven't really seen him since last year's show, but the moment he saw me he greeted me by name, and asked how things were. He was a bit busy helping other customers, and other employees would often stop by and ask me if I needed help when Matt would have to step away. It was a lot like being in their store, except that they only had their chocolate inventory with them. I was happy to see that they still carry chocolates by Chris Blue over at Chocolatier Blue. I didn't think you could still get that in Utah, since Chris left Utah earlier this year to move to Berkeley and start supplying the French Laundry, in addition to Charlie Trotter's and Chez Panisse. Even if Caputo's didn't have the largest chocolate selection in Utah, I would still stop by there just for Chocolatier Blue.
One of the new stars at the show was a company called Choffy. A few months ago I heard about a company taking coffee beans and treating them like chocolate, going so far as to sell a bar of coffee beans, sugar and cocoa butter. Choffy goes in the other direction. They take the cocoa beans and roast them, grind them and brew them as if they were coffee beans. Personally, I've never liked coffee. I've always thought it tasted and smelled like burned chocolate. That being the case, and considering that people actually like that flavor, I thought it might be a perfect product. At Matt Caputo's urging, I headed over to try some out.
They had three different varieties there. From darkest to lightest, they were Nicaraguan, Ivory Coast, and Ecuadorian. I tried all three, in that order. The Nicaraguan was way too much for me, which didn't surprise the sales rep because I'd told him I wasn't a coffee drinker. Even with cream, I didn't like it. Some sugar might have helped, but by that point I wasn't really interested. Ivory Coast was in the middle, and the show favorite. In fact, by the time I got to the booth, they had some brewed, but none left to sell. This one was drinkable, even without the cream. Still, it wasn't my thing. I decided to try lighter still.
I was surprised at how much I liked the Ecuadorian, until I found out that's what it was. I have always liked beans from there, so it's no surprise that I would like them brewed like this too. It was excellent on its own, but when I added a vanilla-flavored creamer, it got even better. I almost shelled out for a bag right then and there, but I decided to wait a couple of paychecks. Besides, I have no coffee equipment, so that would have been an issue too. Unfortunately, you can't buy their product in stores. They've apparently decided to go with some crappy MLM-like marketing scheme, which would normally mean that I wouldn't buy their product on principle. But you can order it online, so I might break down at some point at pick it up. But if they allowed Caputo's to sell it, I would be even more likely to buy it.
Last of all, Ruth Kendrick, author of the famous Candymaking book by HP Books, made her yearly appearance at the show. As expected, she was teaching a class, this time on tempering chocolate. But this year yielded an unexpected surprise for many fans of hers. Early this year, Ruth took off to the Great White North to take some classes at the Callebaut Chocolate Academy in Montreal. She has taken her years of experience and combined it with her newfound knowledge and formed her own chocolate company, Chocolot, which debuted at this year's show.
While Ruth does sell toffee and candied popcorn, her real jems are her truffles, which represent her entry into the truly high-end world of chocolates. They're as pretty as they are tasty, and are sure to impress. Remember how I said I don't normally like honey? Ruth's chocolates are another exception to the rule. My favorite flavor may very well be the beehive honey. I tried one of the chai teas, and it was also excellent: flavorful, but not overpowering. Also on my favorites list are strawverry sabe, australian ginger and rootbeer float.
Be aware that Ruth is very small-batch, and has limits as to where she can ship (anything out of the state is pretty much out of the question). If you happen to live in Utah or know somebody that does and doesn't mind shipping to you, you need to give her a shout. Her truffles are a little pricey, but the quality is excellent.
I'm a little sad that I was only able to stick around for a few hours this year, but I'm glad that I got at least that. As always, the show was a delight, and I can't wait for next year's. Here's hoping it gets a little more advertising the next time around.
I've gotta say, my experience was marred before I even got in the building. I don't know who thought it would be a good idea to do the Gun Show at the same time, but the Sandy Expo Center's parking lot isn't even big enough for one show at a time, much less two. The scary part is, it looked like there was an entire other exhibition hall available, but I could be wrong. The Gun Show might have extended it into it, and I would never have known, because I was only interested in the chocolate.
The show was a little smaller this year than in years past. I attribute this to two things: the wonky economy, and the University of Utah vs BYU game. Sometime around the late afternoon, many of the spectators took off to watch BYU take a thrashing from the Utes. I took off not too long after that, knowing that traffic would be light while everyone was at The Game.
There were a few stars at this year's show that you should know about. As always, Knight Family Honey was around with their amazing honey that comes from (so they told me) a pumpkin field surrounded by an alfalfa field. Okay, so it's not chocolate, but I don't mind. it's fresh, it's raw, and it's darned tasty. Keep in mind, this is coming from somebody that usually doesn't care for honey or its bitter aftertaste. This year they also had honey taffy which was decent, but tasted nothing like honey to me. Still, I liked it and have been snacking on it all day. I have a jar of honey from them too, and I may break that out for a baklava or something.
Tony Caputo's had a booth again this year, and I was glad for it. I'd wondered if Matt Caputo would recognize me, since I haven't really seen him since last year's show, but the moment he saw me he greeted me by name, and asked how things were. He was a bit busy helping other customers, and other employees would often stop by and ask me if I needed help when Matt would have to step away. It was a lot like being in their store, except that they only had their chocolate inventory with them. I was happy to see that they still carry chocolates by Chris Blue over at Chocolatier Blue. I didn't think you could still get that in Utah, since Chris left Utah earlier this year to move to Berkeley and start supplying the French Laundry, in addition to Charlie Trotter's and Chez Panisse. Even if Caputo's didn't have the largest chocolate selection in Utah, I would still stop by there just for Chocolatier Blue.
One of the new stars at the show was a company called Choffy. A few months ago I heard about a company taking coffee beans and treating them like chocolate, going so far as to sell a bar of coffee beans, sugar and cocoa butter. Choffy goes in the other direction. They take the cocoa beans and roast them, grind them and brew them as if they were coffee beans. Personally, I've never liked coffee. I've always thought it tasted and smelled like burned chocolate. That being the case, and considering that people actually like that flavor, I thought it might be a perfect product. At Matt Caputo's urging, I headed over to try some out.
They had three different varieties there. From darkest to lightest, they were Nicaraguan, Ivory Coast, and Ecuadorian. I tried all three, in that order. The Nicaraguan was way too much for me, which didn't surprise the sales rep because I'd told him I wasn't a coffee drinker. Even with cream, I didn't like it. Some sugar might have helped, but by that point I wasn't really interested. Ivory Coast was in the middle, and the show favorite. In fact, by the time I got to the booth, they had some brewed, but none left to sell. This one was drinkable, even without the cream. Still, it wasn't my thing. I decided to try lighter still.
I was surprised at how much I liked the Ecuadorian, until I found out that's what it was. I have always liked beans from there, so it's no surprise that I would like them brewed like this too. It was excellent on its own, but when I added a vanilla-flavored creamer, it got even better. I almost shelled out for a bag right then and there, but I decided to wait a couple of paychecks. Besides, I have no coffee equipment, so that would have been an issue too. Unfortunately, you can't buy their product in stores. They've apparently decided to go with some crappy MLM-like marketing scheme, which would normally mean that I wouldn't buy their product on principle. But you can order it online, so I might break down at some point at pick it up. But if they allowed Caputo's to sell it, I would be even more likely to buy it.
Last of all, Ruth Kendrick, author of the famous Candymaking book by HP Books, made her yearly appearance at the show. As expected, she was teaching a class, this time on tempering chocolate. But this year yielded an unexpected surprise for many fans of hers. Early this year, Ruth took off to the Great White North to take some classes at the Callebaut Chocolate Academy in Montreal. She has taken her years of experience and combined it with her newfound knowledge and formed her own chocolate company, Chocolot, which debuted at this year's show.
While Ruth does sell toffee and candied popcorn, her real jems are her truffles, which represent her entry into the truly high-end world of chocolates. They're as pretty as they are tasty, and are sure to impress. Remember how I said I don't normally like honey? Ruth's chocolates are another exception to the rule. My favorite flavor may very well be the beehive honey. I tried one of the chai teas, and it was also excellent: flavorful, but not overpowering. Also on my favorites list are strawverry sabe, australian ginger and rootbeer float.
Be aware that Ruth is very small-batch, and has limits as to where she can ship (anything out of the state is pretty much out of the question). If you happen to live in Utah or know somebody that does and doesn't mind shipping to you, you need to give her a shout. Her truffles are a little pricey, but the quality is excellent.
I'm a little sad that I was only able to stick around for a few hours this year, but I'm glad that I got at least that. As always, the show was a delight, and I can't wait for next year's. Here's hoping it gets a little more advertising the next time around.
Subscribe to:
Posts (Atom)