A few days after presenting my offer, I was presented with my itinerary. Upon my return I picked up some ingredients, got the camera ready, and put together the first baklava that I had made since starting this blog.
I'll admit, baklava looks like a scary thing to make. And unfortunately, few people that make it do it right. Almost every baklava I've ever had has been either too dry or too soggy, and they've also generally been sickeningly sweet. My baklava, as I promised to my boss, is different. It's not too sweet, dry or soggy. It's also not incredibly traditional. Well, screw tradition, I say! This is a dang good baklava!
You may recall a couple of years ago when I make some phyllo cups. If you can handle those, this shouldn't be a problem. You may also want to brush up on making clarified butter. First, the cast of ingredients (a la The Pioneer Woman):

Ingredients
Sugar/Spice Mixture:
1/2 cup sugar
1 tsp cinnamon
1 tsp nutmeg
1/2 tsp cloves
1/2 tsp allspice
Simple Syrup:
3/4 cup sugar
1/4 cup honey
1/4 cup water
juice of half a lemon
juice of half an orange
zest of a lemon
zest of an orange
2 cinnamon sticks, broken in half
6 whole cloves
The Rest of the Baklava:
1 cup pistachios
1 cup pecans
3/4 cup sliced almonds
1/4 to 1/2 lb clarified butter
20 sheets (1/2 lb or 1/2 a box) phyllo dough
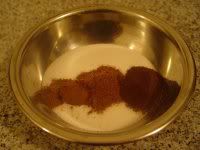
To start off, you'll need a few spices, mixed in with some sugar. This is kind of a high-end cinnamon sugar that you can sprinkle later on your toast. In fact, you'll have some left over for that, so make good use of it.
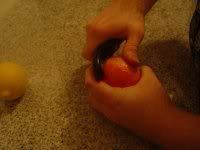
This is also not a bad time to get together the ingredients for a simple syrup. The hardest part is getting some lemon and orange zest ready. Don't bother with a microplane grater on this one; just use a vegetable peeler.
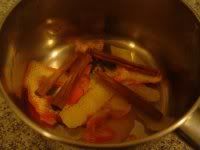
Go ahead and toss the zest in a sauce pan, along with some sugar, honey, water, orange and lemon juice, and whole spices. You can set those aside for now.
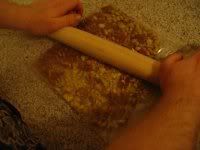
Next up, you'll need some nuts. I went with pistachios, pecans and almonds. You can either pulse them in a food processor, or do what I always do and toss them into a zip-top bag and roll them with a rolling pin. The texture is inconsistent, which I actually kind of like.
Now that you have those things out of the way, it's time to move onto the fun stuff: the phyllo dough. You'll want 20 sheets (half a box) of phyllo dough, a stick or two of clarified butter, a 13 x 9 baking dish brushed with clarified butter, and a kitchen towel that is just barely damp.
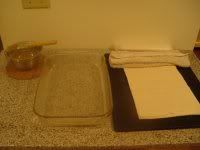
The towel is to keep the phyllo from drying out while you're working with it. Just between you and me, I don't really use it. I've been working with phyllo for so long that I'm fast enough to go through half a package (that's one whole baklava) without needing it. You'll get there, don't worry. Now go ahead and lay out a sheet of phyllo and brush it with clarified butter.
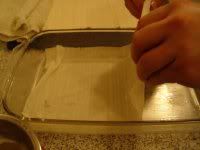
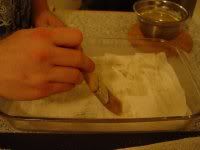
Repeat until you have 6 sheets laid down. Then go ahead and divide up the nuts into thirds, and sprinkle one third onto the phyllo.
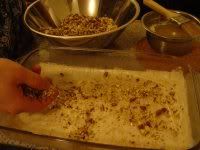
Follow up with a sprinkling of the spice/sugar mixture. I moved mine into a leftover spice jar, to make it easier to sprinkle evenly, and to keep it later for toast. Don't feel like you have to use it all. You just want a thin layer, barely capable of even being called a layer.
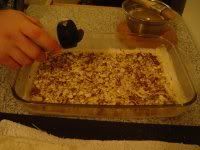
Go ahead and lay down another sheet of phyllo and brush with clarified butter. Go easy on this one, since there's a layer of nuts underneath waiting to tear holes in your phyllo. Just between you and me, if you think this part is going to be too hard, feel free to lay out another cutting board and do your layers of phyllo on that, and then move the layers of phyllo on top of the nuts. You'll want four sheets of phyllo on this layer.
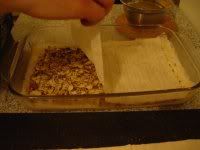
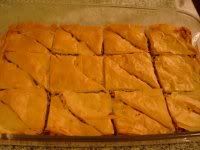
Keep going until you have three layers of nuts and four layers of phyllo. The top and bottom layers should be 6 sheets each, and the inner layers should be 4 sheets each. When it's all finished, go ahead and cut it into squares, and then cut the squares into triangles.

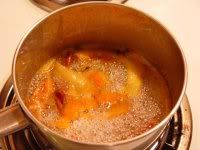
Toss it in a 350F oven for about half an hour. While it's baking, you need to cook up the simple syrup. Bring it to a boil, then drop it to a simmer until the baklava comes out of the oven.
Pull the baklava when it reaches a golden-brown color. Mine actually was a little darker than it shows in the photos. Just be careful not to burn it.
Go ahead and pull the large bits (zest and cinnamon) out of the simple syrup with a pair of tongs. Don't worry about the smaller bits, we're going to strain them out. In fact, you might as well just strain them out onto the baklava. The syrup is hot and the pan is hot, so there will be some sizzling. The sizzling will continue for at least a couple of minutes.
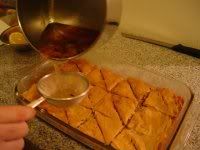
Make sure you wait until the baklava cools down before you try serving it. In fact, if you can manage to wait a couple of days, it will actually get even better. At the very least, you should wait overnight. Me, I waited until the sugar was cooled enough not to burn me.
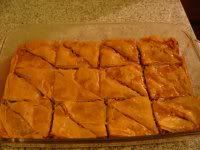
The reviews on this were excellent. I had a couple of coworkers that had previously told me that they hated baklava, tell me that they were now convinced that I was the only person in the world that could actually make good baklava. Several people told me that it definitely wasn't traditional, and everyone liked that it wasn't too sweet. It was a hit with everyone who tried it.
I grew up on baklava- every family occasion- a party or just dinner, this was the dessert.
ReplyDeletei have seen my mother in law make it hundreds of times but I have never tried making it, even my husband has made different kinds- pistachio filled, cherry filled, ect..
i think you have inspired me to finally give it a try. Thanks for sharing, they look yummy
Thanks for sharing!