Before you start, make sure you have all of your ingredients together:
1 lb ground beef (80% lean)
Worcestershire sauce, to taste
Italian seasoning, to taste
14 oz mirepoix
1 red bell pepper, diced
30 oz tomato sauce
15 oz canned diced tomatoes
2 teaspoons garlic powder
1 teaspoon smoked paprika
1 lb mozzarella
15 oz ricotta
1 large chicken egg
16 oz dry lasagna noodles
Kosher salt, to taste
freshly ground black pepper, to taste
Some of you are already scoffing at me using things like (presumably store-bought) Italian seasoning and garlic powder. There is no shame in having these things handy. The Italian seasoning I used is pretty dang tasty, and already formulated. I also liked that it, and the garlic powder, were dried. That means you can add them early and have the flavors permeate the dish longer and more easily.
Before you start on any of this, you'll probably want to preheat the oven to 350F, and grease up a 13x9 baking dish with cooking spray. Go ahead and set it aside for later. Our next step is to brown up about a pound of ground beef.
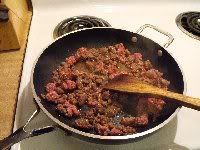
Season to taste with Kosher salt, pepper, Italian seasoning and Worcestershire sauce. I probably used about a Tablespoon of the Italian seasoning and maybe twice that of Worcestershire sauce. Don't cook it too long, just long enough to brown it. And make sure the seasoning is where you want it right now. Trying to compensate later for poor seasoning now isn't going to be easy.
When it's all nice and browned up, spoon it onto a paper towel-lined plate and set it aside. Try to leave as much of the fat in the pan as possible, you'll need it in a moment.
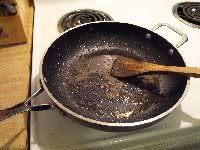
Okay, who here got confused when they saw mirepoix on the ingredient list? Wow, look at all those hands. Don't worry, it's not so bad as you think. Mirepoix is a 2:1:1 ratio of onions to carrots to celery. It's a French thing that works pretty well with Italian dishes. And as it turns out, Kroger has started selling it in the freezer section in little 14 oz bags. Add that, along with the red bell pepper, to the fat and crank the heat to medium-high. We want to get some nice color on these veggies.
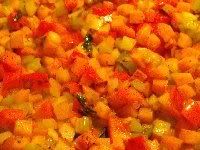
Did I mention to make sure these are well-seasoned? Kosher salt, pepper, Italian seasoning, Worcestershire sauce. Make sure you season each layer of this dish before moving onto the next one. Speaking of the next layer, once you have some color on your veggies, go ahead and cool down the pan a little by adding the tomato sauce and the diced tomatoes.

Time for another layer of flavor. Notice a pattern here? Same drill as before, but go ahead and add in the garlic powder and smoked paprika with the other seasonings (Kosher salt, pepper, Italian seasoning, Worcestershire sauce). Let it simmer for a bit; how long is really up to you. I went for maybe five or ten minutes. I also stole some of it at this point to spread out on the bottom of the baking dish.
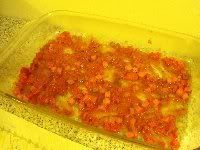
This is important. There are going to be a few layers of pasta in this dish, and you want to make sure you have a tomato sauce layer directly above and below every single layer of pasta. We're not going to use the pasta yet, just keep it in mind.
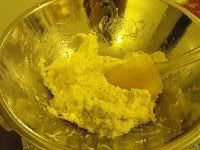
While the sauce is simmering, you'd better get the cheese ready. You're going to put together a container of ricotta, about 3/4 lbs of shredded mozz, a single chicken egg, and maybe a Tablespoon of Italian seasoning. I didn't say this in the ingredient list because I forgot it (oops!), but you can add 1/4 cup of grated Parmesan too. Go ahead and mix it all together in a bowl and set it aside. You'll need it in a moment.
When you think you're ready, and you have a layer of sauce in the baking dish, go ahead and add the meat into the sauce. You want to do this after you've sauced the baking dish, because you really don't want the meat stuck to the bottom. You will want a layer of dried noodles, however.
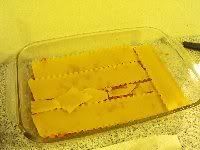
I love this part. Didja notice something about the pasta? Like the fact that we didn't blanch it first? So awesome. See, this is the beauty of lasagna: the moisture from the rest of the dish cooks the noodles for you. Okay, yeah, it'll add another 20 minutes of cooking time or so. But that's okay; the longer it cooks, the better the flavors marry. Your chances of soggy noodles will also decrease. Next up, add a layer of sauce.
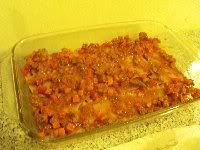
This part is actually trickier than it seems. You see, you're going to have four layers of noodles, with sauce layers on both sides. That means eight layers of sauce, and this is number two. The sauce is important: it's responsible for cooking the noodles. But as tricky as that step was, it doesn't compare to this one: add about a third of the cheese mixture. It's easiest if you dollop it in small increments and then spread it with a spatula.
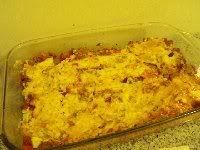
Oh man. You're going to hate me right about now, because it's time to add another tomato sauce layer. And then pasta, tomato sauce, cheese, tomato sauce, etc, until you have your top layer of pasta, and it's covered with sauce. Cover that layer with the last 1/4 lb of shredded mozzarella. Don't worry if it looks a little sparse. It'll be plenty.
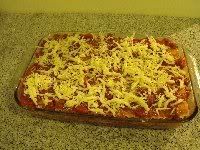
Go ahead and sprinkle, really lightly, some Italian seasoning on top. Remember how I forgot the Parm in the cheese mixture? It may not be a bad idea to sprinkle a couple of Tablespoons on top as well. I'll let you add that to your own ingredient list. Now, go ahead and cover it with some aluminum foil. Try not to let the foil touch any of the cheese.
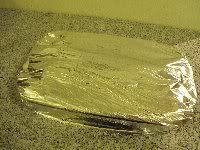
Slide that guy into your 350F oven and give it about 40 minutes. If you think about it, we're really only doing a couple of things here. We're not actually cooking the dish (except for the noodles) because the ingredients are already cooked. That's important to remember with casseroles. You're not cooking them, you're reheating them. Also, we're melting the cheese. But that part really happens at the end. At about 40 minutes, remove the foil and give the lasagna another 10 minutes to melt and maybe even brown the cheese a little.
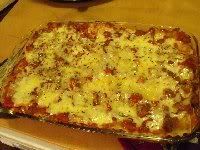
Oh man, doesn't that look good? Well, bad news. You can't touch it yet. I know it's going to be torture, but you need to recover it with foil and let it sit for another half hour. It's gotta have time to cool, and to finish cooking those noodles. If you were to serve it at this point, it would burn your tongue, and the noodles would be a little too al dente.
A few more points before I let you loose on this dish on your own. First of all, I cheated more on the cheese than I let on. For some reason, Monterrey Jack sounded really good that day, so I used that instead of mozz. In the past, I've also mixed Jack and Cheddar. And one of my all-time favorite lasagnas was dubbed "pain lasagna". Instead of tomato sauce, I used hot enchilada sauce. Instead of meat, I used black beans, pinto beans and corn. I didn't mix them into the sauce, I added them as their own layer underneath the cheese layer. Speaking of cheese, I went with hot pepper Jack and habanero Cheddar that time around. It was so good, it brought tears to my eyes. Actually, the tears were mostly from the pain, but the flavor was good too.
Lasagna has a lot of room for interpretation. At its most basic, it's little more than alternating layers of sauce, cheese and noodles. Beyond that, you're on your own.
As a kid, my mom always struggled to make sure lasagna stay together once it was cut. The poor thing always ended up more like spaghetti than a well-formed slice of heaven. Tasty, but ugly.
ReplyDeleteLuckily my wife does a mean lasagna. We try to plan lasagna for after an oriental meal (mabo dofu being a favorite) so we can add the excess tofu cubes. They add absolutely no flavor of course, but it's a nice way to use them and it adds some creaminess.
The last few years we've switched to so called "oven ready" noodles. I'm curious to know the actual difference (I don't recall if the price is the same) but they explicitly claim to not need pre-boiling. That's a real time and hassle saver there.
Another recommendation for those with small families, put half the recipe in a disposable 9x9 pan, cover with foil and stash in the freezer for up to a few months. Thaw it out before hand or just bake for a bit longer. Tastes just as great (to my palate anyway).
My wife made this lasagna this week. It turned out quite good! She chose not to use as much worcestershire sauce as you did, but other than that it was unchanged. Thanks for the recipe!
ReplyDelete