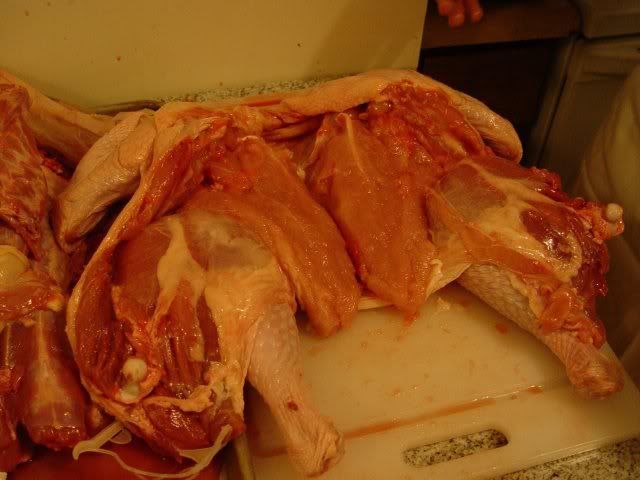
The idea with a turducken is to remove all of the bones from a chicken and a duck, and most of the bones from a turkey, and stuff the chicken inside the duck, and the duck inside the turkey. Traditionally, there would be stuffing between each bird as well. As it turns out, removing most of the bones from the turkey isn't difficult, so long as you leave the skin on. Doing the same for a chicken and a duck was far more difficult, especially since we decided to remove the skin.
What we ultimately ended up with were a boneless, skinless chicken and duck, quartered. Because we tried to keep it from being quartered, it took much longer than it would have if we had just quartered it properly in the first place. Now, I'm not saying that this is the correct way to make turducken. It's just the way that we ended up with.
Bearing that in mind, let's go through the steps after we deboned all of the birds. With the turkey, you don't have to remove the bones from the wings or the drumsticks; you just have to remove the bones from the body. This isn't bad, and it leaves you with what is essentially a butterflied turkey.
Before you even started the process of deboning these birds, I hope you made some stuffing to stick inside of them. The stuffing should be cooling to room temperature while you debone the birds. We ended up using about 6 cups total. Try to make it a little drier than usual; part of its job is to soak up juices. Go ahead and put down a layer of fully coolled stuffing.

Next up comes the duck. Lay down the duck breast in the middle, and the rest of the meat on the side.

Give it another layer of stuffing.
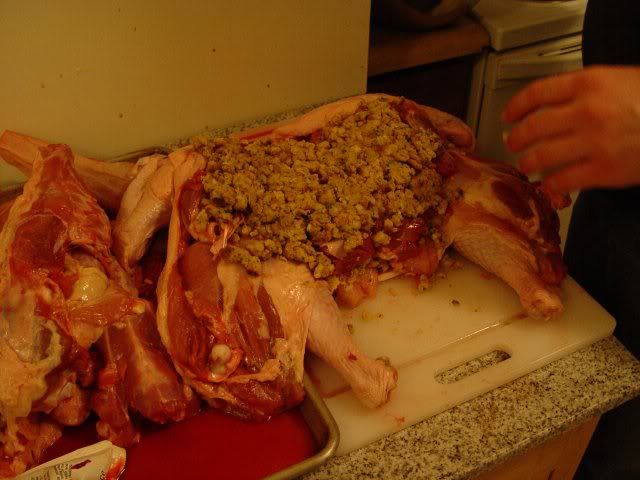
And then follow up with the chicken, breast in the middle, rest of the meat on the outside.

This is where you use up the last of the stuffing. Don't feel like you have to use it all. The birds are going to be plenty hard to close up anyway, and more stuffing will just make it more difficult.
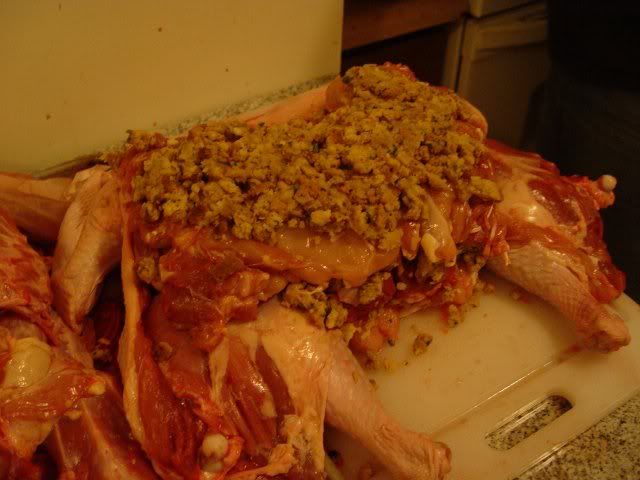
This part will be interesting. You need to close up the bird, and then keep it closed. At first, this doesn't seem so difficult.
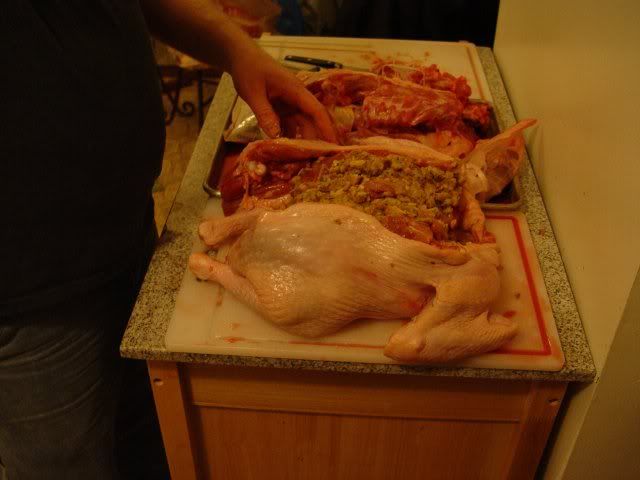
But you'll find that keeping it all together is going to be rough. It'll help to have a second person helping out here, because they'll need to hold the turkey closed while you thread a couple of skewers through the skin.
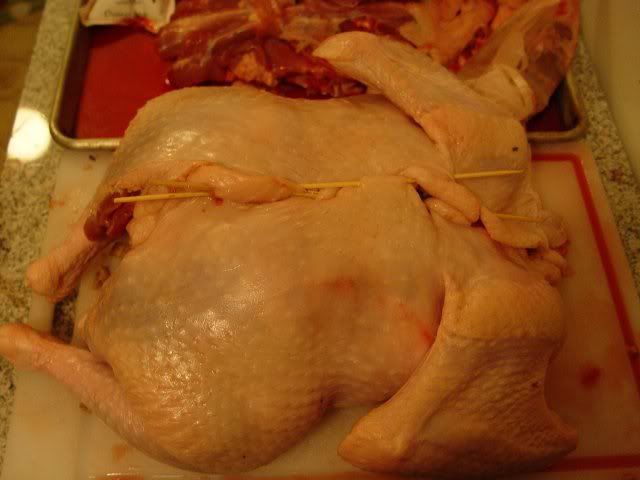
Next up, roll the turkey over on top of the seam, and move it to a baking pan. You probably can't see it with my baking pan, but I have a rack in the bottom. Also, I would liked to have tied the legs back together, but I couldn't find my butchers twine.
Believe it or not, I think this next part was actually more difficult than building the bird. We had to cook it. We didn't cook it right away, actually. We covered it and put it in the fridge, to cook the next day. We pulled it from the fridge at the same time we started pre-heating the oven, with the hopes that it would come somewhat closer to room temp by the time we stuck it in the oven.
I prepared for this event by watching Alton Brown cook several turkeys, both on Good Eats and on Food Network "All-Star" holiday specials. Stuffing or no, there was always one constant: he did the majority of cooking at 350F. He stated at least once that lower, slower cooking times would contribute to drying out the bird. He also would tend to start the bird at a higher temp, to get some browning going, and then liked to put a foil shield over the breast to keep it from overcooking.
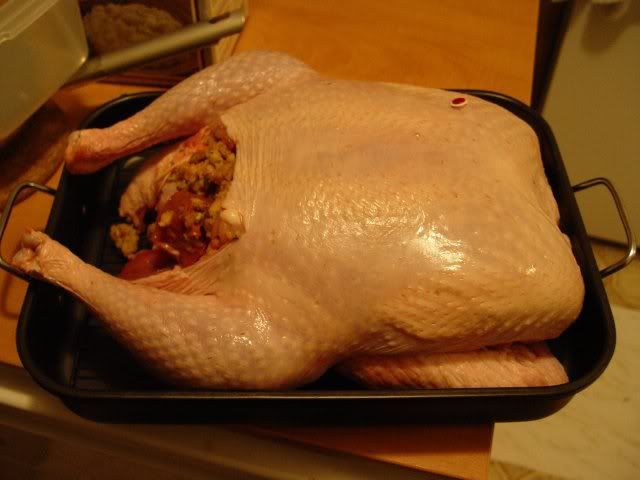
I started by giving the bird a spritz of cooking spray. I knew the oil would aid in proper browning, and that's important. I also fashioned a triangle-shaped shield of foil to cover the breast, before I put it in the oven. The shield would be added later.
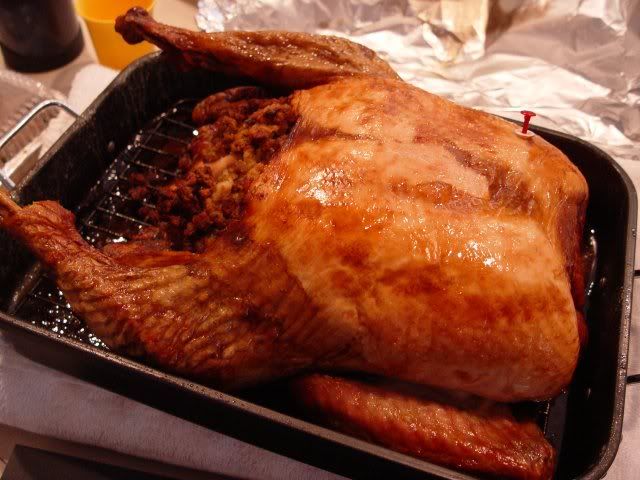
I started the cooking process at 400F, to get some decent browning on the bird. Once it looked presentable, I covered the breast with the foil shield and put it back in the oven, at 350F. Since I have also misplaced by probe thermometer, I had to check the internal temp with an instant-read thermometer. My goal was the high 150s, since I knew that carry-over cooking would take it to 165F on the way to my dad's house.
Total cooking time was about 3 hours. Somewhere around the 2 1/2 hour mark, I started to chicken out (no pun intended) and drop the oven temp. It eventually came down to maybe 310F or so. I'm still not convinced this was the right action. When the bird was just shy of 160F, I pulled out and covered it completely with foil. Before I covered it, it looked like this:
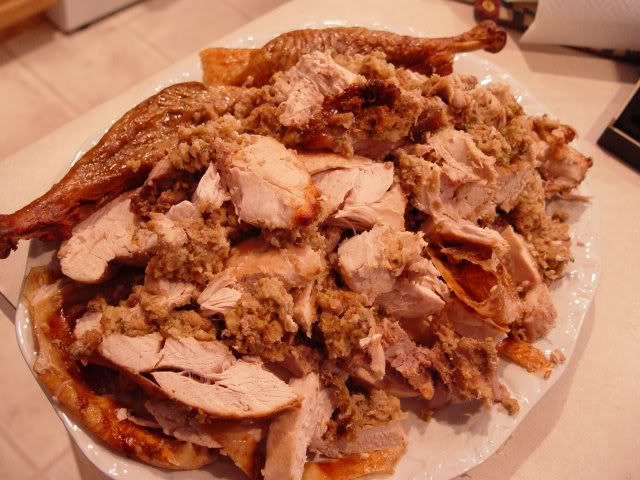
When we got it to my dad's house, we let everyone see it before carving it. Then we set about carving it, which should have been a simple task. Since all of the bones are removed from the inside, we should have just been able to cut cross-sections. But since some of the outer bones remained, they initially got in our way. Eventually, I was able to come up with a good cross-section.
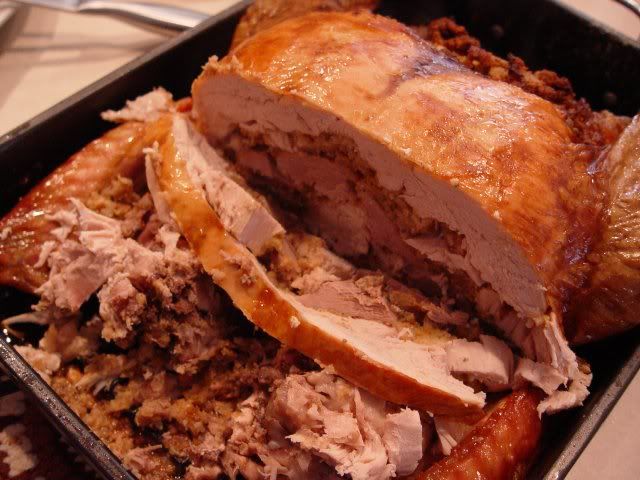
Yes, the meat looks a little dry, doesn't it? This probably has to do with my lowering the oven temp, and/or having to open the oven repeatedly to check the temp, since I didn't have a probe thermometer. Fortunately, it wasn't too dry. Just a tad.
I carved up the whole thing, and moved it all to a platter. I kept the drumsticks intact, but laid out the rest in easy-to-serve pieces, nicely garnished with all of the stuffing.
I noticed that the duck was not a gamey as it usually is. I don't know whether this is because it had chicken and turkey juices mixed in with it, or because it was fully-cooked, instead of medium-rare as duck is normally served. I imaging it's a combination of both, but mostly the second. The chicken was decently cooked. Nobody got sick from undercooked stuffing. All in all, I think it turned out better than expected, but it certainly wasn't a professional job. I think next time we do a turducken, I might just order one premade from The South (tm) and see how they did theirs. Still, not a bad first try.
I still think Turducken is nasty. That's way we have many jokes in our family about turducken.
ReplyDeleteAli-Kat - No, no. THIS turducken was excellent! The flavor was very good. The after dinner nap was fantastic! The only drawback was I didn't get any leftovers.
ReplyDeleteTurducken is a tradition in my family (as I live in Louisiana) and I can tell you that there are several places where you can order turduckens done properly although it may be more fun to make your own. The best turducken I have had came from Hebert's a little Meat shop in Maurice, LA they have two stores in Texas. You can find them at Hebert's Meats . You may also want to try my personal favorite holiday desert, Pralines, perfect before nap time.
ReplyDeleteI thought the Turducken was fascinating. I don't remember eating it when Dad made it but I would love to try it again. After looking at some of Joseph's observations, I agree that he should have stuck with the higher temp. Alton Brown has never led me astray yet and my Thanksgiving Turkey came out awesome. Don't doubt the man.
ReplyDelete