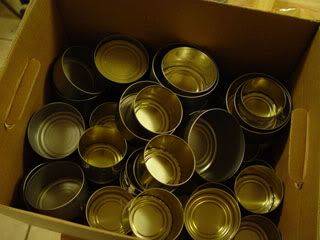
To what end so I save these? They are gold. Free cooking equipment, and that's a deal I never like to pass up. The olive and pineapple cans are especially handy because the bottoms can be cut away with a can opener, just as easily as the tops. This makes them ideal to use as little pastry rings. Granted, you don't have the luxury of as many sizes as a professional set of rings, but you also don't have the cost.
The tuna cans aren't as nice, since the bottom is too rounded to be able to cut away with a regular can opener. But that's okay, because you can still use them for baking miniature cakes. Yes, you could also use muffin tins. But empty tuna cans are a little shorter, a little wider, and have perfectly straight sides. This makes them idea for individually-sized cheesecakes. Those of you who remember my posts on cheesecake and cheesecake crust should be familiar with these steps.
Tuna Can Cheesecake
Crust:
1 1/2 cups graham cracker/cookie crumbs
2 tablespoons (1/4 stick) unsalted butter, melted
1 tablespoon white sugar
Filling:
16 oz cream cheese, softened
1/2 cup sugar
3 large chicken eggs
1 teaspoon vanilla extract
Preheat the oven to 350F. You will need six empty tuna cans, with their lids. Be careful with those lids! They're sharp! To prepare the cans to be used as cheesecake tins, place the lids in the bottoms and give each a quick spritz of cooking spray. You don't need to get the spray on the bottom, but you do need to get it on the sides. Cut out strips of parchment paper to wrap around the sides of the tuna cans. The cooking spray will help it stick. It's okay if the parchment is a little taller than the cans, but not so much if it's shorter.

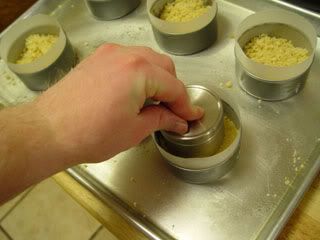
I used crumbled up shortbread cookies, but if you want to be boring, er, traditional then feel free to use graham cracker crumbs. Combine with melted butter and sugar, and then divide evenly between the six cans. I use a spice tin to pack down the crumbs, but you can use whatever you want.
Arrange the cans on a sheet pan. Bake the crusts for about 5 minutes at 350F, and then move to a counter to cool. In fact, once the sheet pan is cool enough to touch without hotpads, it wouldn't be a bad idea to move these to the fridge for a few minutes. You want them to be completely cooled before you use them.
For the filling, cream together the soften cream cheese and the white sugar until light and fluffy. Make sure to scrape the sides of the bowl and the paddle of your mixer a couple of times. The last thing anyone wants is a lumpy cheesecake. Add the eggs one at a time on low speed, waiting until each is completely mixed in before adding the next. Make sure to keep scraping every one or two eggs, to make sure everything continues to mix properly. Finish up by adding the vanilla the same way. Divide your batter between the six cooled crusts.

Bake at 350F for about half an hour, until the centers of the cheesecakes are just a little wobbly. No, you don't need a water bath. These won't be in the oven for long enough to overcook, another advantage to using smaller sizes. When the centers look good, turn the oven off and leave the door open just a crack for one minute. Then close the oven door and let the cheesecakes sit in the oven for another half hour as it cools down with them. The carryover heat from the oven and from the cheesecakes themselves will let them coast to a perfect finish. You can serve immediately (yet one more advantage of the small size, and not having to cut slices), or you can chill for a few hours first. When you're ready to remove them from the pans, just carefully invert into your hand, or onto a plate, and then turn over onto your final serving vessel.
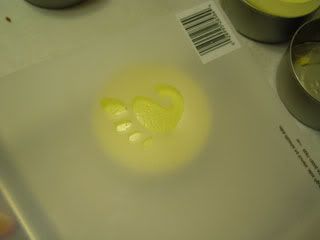
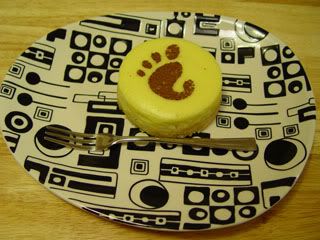
We could just stop here, and have perfectly serviceable little cheesecakes. But that wouldn't be like me, would it? I think there are still ways for us to improve upon this dessert. Specifically, we need some artwork. And truly, is there anything more appetizing to see on a cheesecake than a stylized footprint? What we need is the Gnome logo. I'm sure you all remember the template I made for my Firefox cookies, right? Pick up a blank stencil sheet from your local crafty-type store and cut out a Gnome logo, or whatever other image you want. Try not to go bigger than about 2 1/2 inches around, or else your design will be too big for your cheesecakes.
Lay your design on top of one of the cheesecakes. Don't worry, if you're using a plastic stencil sheet like I did then stickage will be minimal. It really does need to be right on top of the cheesecake, or else you'll get fuzzy edges.
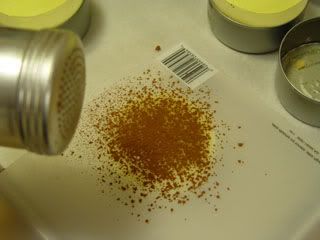
You'll need a shaker full of cocoa powder (Dutch-processed, if you can find it) for the next part. If you don't have one, then a little sifter full of cocoa powder will do. Being careful not to get any on any of the other cheesecakes, shake enough cocoa powder on to fill in the design in the stencil. When you think you have enough, carefully remove the stencil, being careful not to spill any of the excess cocoa powder. When it's a safe distance, go ahead and shake the excess into a bowl, to save for later.
When you've finished with all six cheesecakes, go ahead and chill until you're ready to serve. This is one dessert that's definitely sure to please. And while a Gnome foot would be ideal, you can use any design that you can cut out of a blank stencil sheet.
Special thanks to Mairin Duffy, for permission to use the Gnome logo!
Thanks for the tips in saving tuna cans. Well,I think I'll start to do that too for I just love baking cheesecake.
ReplyDelete