I never got the recipe from her, and one day I decided it had been too long since I'd had it. Rather than calling her up and asking for the recipe, I hopped online and started looking. This was during the height of the first dot com bubble, and we had just heard of this Google thing. I found several recipes online, which may have been the beginning of my composite recipes, where I would compare several different versions of the same recipe and then make up my own.
In looking through all the recipes, I also finally figured out who this Sally Lunn lady was. Apparently it comes from "soleil lune", French for "sun moon", and refers to the original sweet rolls which were golden yellow on top (like the sun) and white on the bottom (like the moon). My mom usually baked this in a bundt pan, and while I don't really understand why, I have since followed suit.
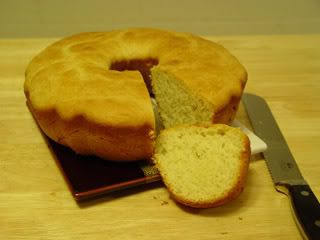
Sally Lunn Bread
1/4 cup warm water (about 110F)
1/4 oz/wt active dry yeast
5 1/4 oz/wt granulated sugar
15 1/2 oz/wt all-purpose flour
1/2 teaspoon salt
1/2 cup unsalted butter, melted
3/4 cup whole milk
1 whole chicken egg
Start by sprinkling the yeast into the warm water, along with maybe a teaspoon of the sugar. Whisk the rest of the sugar together with the flour and salt in another bowl. Add the butter, milk, chicken egg and yeast mixture, and combine to form a relatively wet dough. Mix it until it starts to pull away from the side of the bowl. Move to an oiled bowl, cover with plastic wrap or a damp tea towel, and allow to rise in a warm place for about an hour and a half, or until it doubles in size. Fold the dough a couple of times and then move it to an oiled bunt pan. Cover the same way as before, and allow to rise in a warm place for another 45 minutes, or until it rises to half again as large. While this is rising is a good time to turn the oven on to 350F to preheat. When the dough has finished rising, put it in the oven and then drop the tempurature down to 300F. Bake for about 45 minutes. At the 30 minute mark, brush the top with melted butter, and then brush again when it comes out of the oven. Allow to cool for a few minutes, and then serve warm, if possible.
The best way to serve this? Buttered, of course. Or you could use jam. It's also quite tasty by itself. This isn't quite a sandwich bread. It's more of a dessert bread, or even a breakfast bread. As I'm sure you've already guessed, all of that sugar makes it sweeter than most breads, so you probably don't want to be using it for savory applications. Because of all of the butter, it also doesn't have a whole lot of gluten formation, so don't bother using bread flour; it won't really do a whole lot for you.
Of course, this weekend I had to tweak with the recipe a bit. I saw a lot of fresh raspberries at the grocery store yesterday, and in fact they were so fresh that they didn't even have mold on the bottom like you see all too often in the produce section.
I bought a container with 6 oz/wt of fresh raspberries. Since I knew they would add a good bit of moisture, I decided to add a little more flour to the recipe. In fact, I used one full pound of all-purpose flour. The rest of the ingredients remain the same, other than the raspberries. The dough was a little less wet than before of course, but still pretty sticky. After the first rise, when I was folding the dough in on itself, I added the raspberries and folded them in every so carefully. They'll burst in the oven, but you don't want them to before that if at all possible. If your dough gets all red, it won't be nearly as interesting. The idea here is to get little bursts of raspberry flavor.
Of course, with the addition of this moisture, the baking time will increase too, if only by a few minutes. I added another 10 minutes to my baking time, which seemed to be perfect.
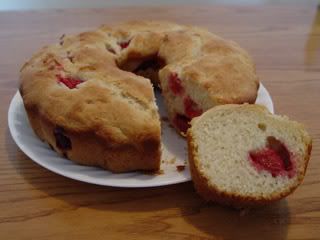
Okay, so the bursts of raspberry weren't so little. But they were tasty. Of course, you don't have to use raspberries. You could use strawberries or blueberries. You could use bananas or peaches. I suppose you could use sauteed onions too, but I would drop most (but not all) of the sugar if you decide to take that route. I might also note that this recipe does bake quite nicely in standard loaf pans too. Bake it how you like, and make sure to play with it like I did.
No comments:
Post a Comment
Comments for posts over 14 days are moderated
Note: Only a member of this blog may post a comment.