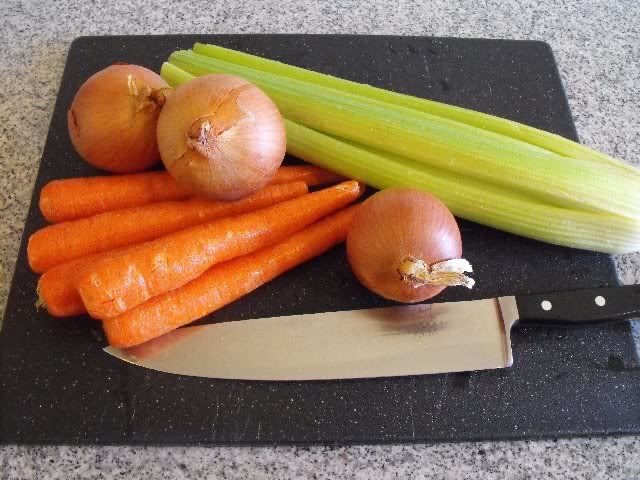
One of the most important components of classical French cooking is mirepoix. A classic French mirepoix is composed of a 2:1:1 ratio of onions to carrots to celery, meaning that four cups of mirepoix would contain two cups of onions, one cup of carrots and one cup of celery. Some of you may also have heard of the cajun version of mirepoix, called trinity. The ratio is the same, but the carrots have been replaced with green bell peppers.
Mirepoix is used as the basis of a number of dishes, not only in French cooking, but in other cuisines. The ratios may vary a little, and the name may change (or not even exist at all), but the combination of onions, carrots and celery is classic. Recently some stores have even started selling both mirepoix and "cajun-style mirepoix" in the frozen foods aisles, which is convenient. But if you're willing to take the time to cut your own mirepoix and maybe even freeze it yourself, it will likely be cheaper, plus you can have a little better control over the quality.
I'm going to show you a few knife cuts here suitable for home use. You've probably seen all sorts of ways to cut these vegetables, and if you've been to cooking school, these methods are probably not what you were taught. They certainly weren't what I was taught, and if I were working for somebody like Thomas Keller, I wouldn't be using them either. But since I'm just cooking for me and my family, they will suffice.
Let's start with carrots. Go ahead and wash them, but don't bother to peel them. There's no reason to waste good carrot like that. With most carrots I see in grocery stores, you should be able to chop them in half, then cut the smaller half lengthwise into four pieces, and the larger half lengthwise into six pieces.
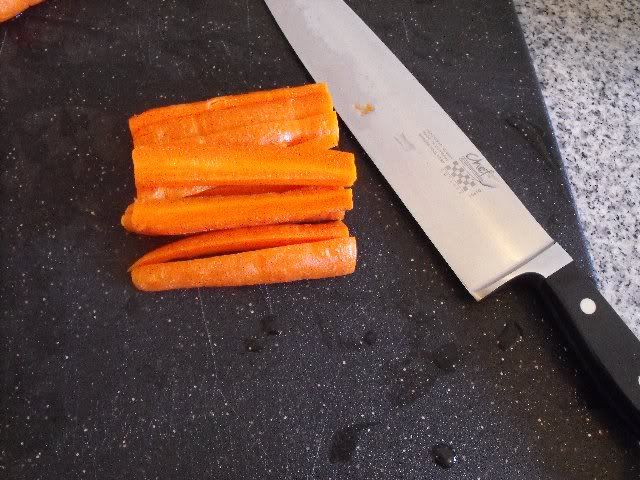
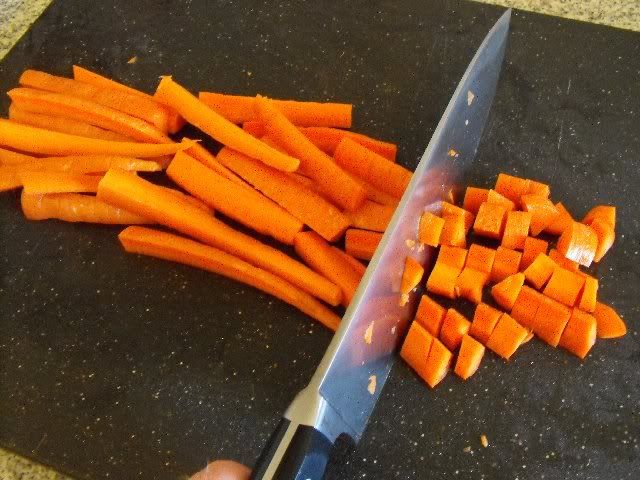
Go ahead and cut up a few carrots like this. When you have enough, there's a tip you can use to save yourself some time. Spread them out in a line across your cutting board, and start working your way across with your knife, dicing them up into pieces with as uniform a size as you can manage. Remember, accuracy is more important than speed, especially considering the sharp knife that I expect you to be working with.
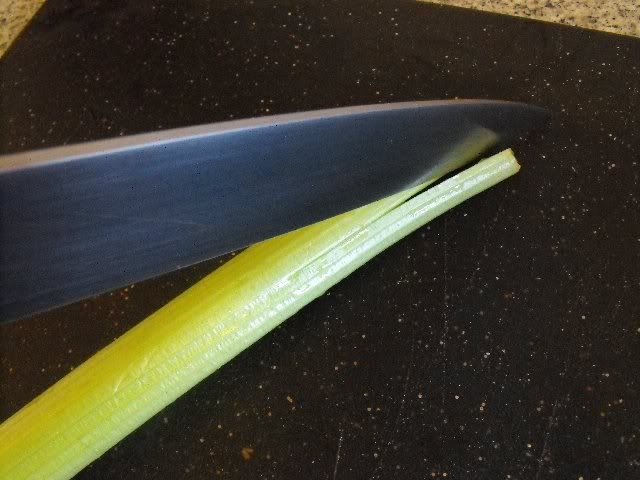
Let's turn our attention to the celery. This is actually a little more difficult to cut, because it has kind of an awkward shape to it. The key is to bring it down to the same level as the carrots. First, grab a bunch of celery and cut the end off. Don't go crazy with it, you just want to be able to separate the stalks from each other. Don't be getting all wasteful on me.
When it's separated, go ahead and wash it in cold water. There were plenty of places for dirt to hide when it was together, and you need to get rid of it. With that out of the way, go ahead and lay a stalk down and slice off a piece of it length-wise.
With that piece cut away, go ahead and make the next cut. Be careful with these! It's easy to get carried away and go too fast. I've lost track of the number of times that I started to think I was a big-shot chef with ninja knife skills, only to end up slicing myself. Remember, accuracy before speed.
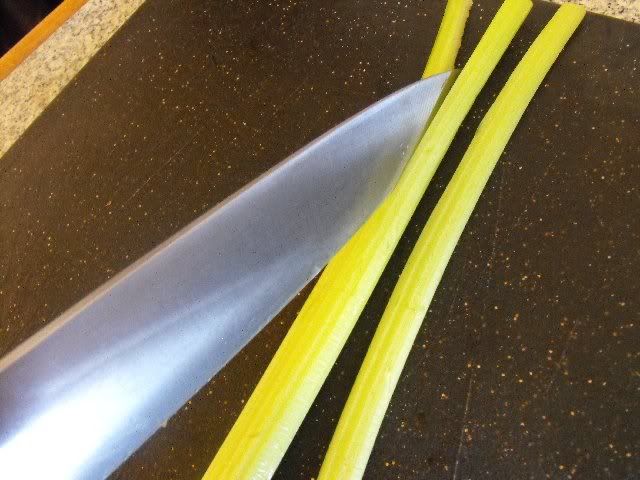
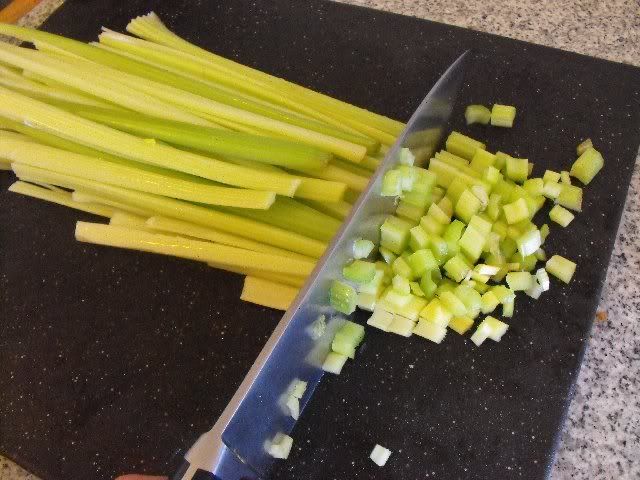
Now you have a bunch of long sticks of celery, ready to be diced just like the carrots. Lay 'em out the same way, and chop 'em up.
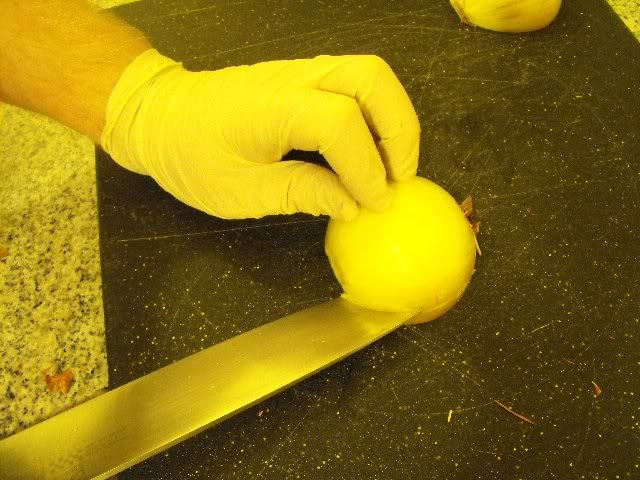
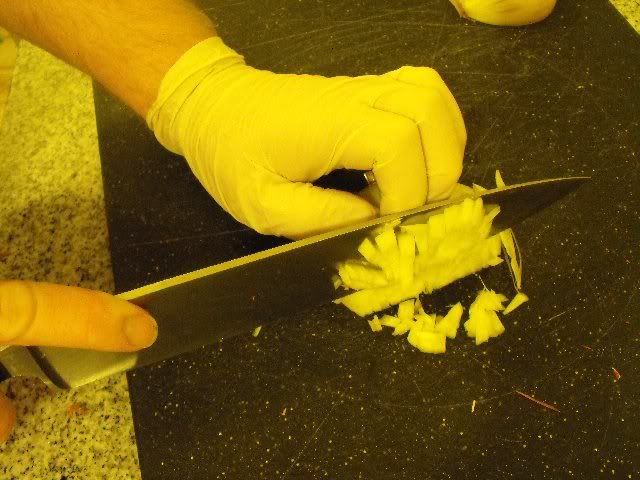
Last up, onions. These are actually very easy to cut, but they have their own dangers. You know what I'm talking about: the tears. I can give you a few tips, but when it comes down to it, you really just need to learn to suck it up. Take a step back if you start crying too hard, give it a break, then go back to it. First things first, you need to cut the stem end off.

Be careful not to cut too much of it off, because you actually need some of it to hold the onion together for a moment. Cut the flower end off too. Then go ahead and slice it in half, from end to end, so that you have two halves that are both held together at the stem.

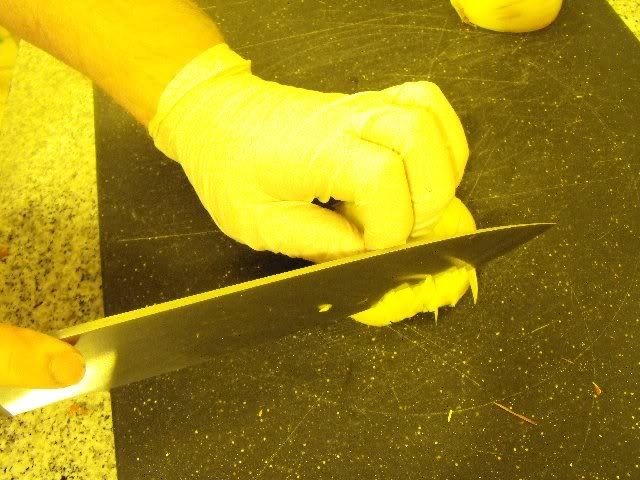
At this point you can go ahead and peel away the papery part and throw it away. You might even want to put the cut sides face-down on the cutting board for a few minutes. Believe it or not, this seems to help dissipate some of the sting. When you're ready, slice the onion on the side, but not all the way to the stem. You still need that holding it all together.
Keep making slices like this at an angle, working your way around the onion. What you're going for are little fingers of onions held together by the stem. Another little tip here: try not to stand directly over the onions when you're cutting them. I think everybody does it, and it just puts you in the line of fire for onion fumes. Stand back a little and you will have fewer tears.

When you've worked your way around, it's time to actually dice the onion. Being careful not to cut your fingers, you want to slice across the cuts that you've already made. This is much easier, because that stem is still holding the onion together.
Keep going until you get almost to the stem. Feel free to cut as close to the stem as you want, but don't cut up the stem itself, I don't think you'd really like it.
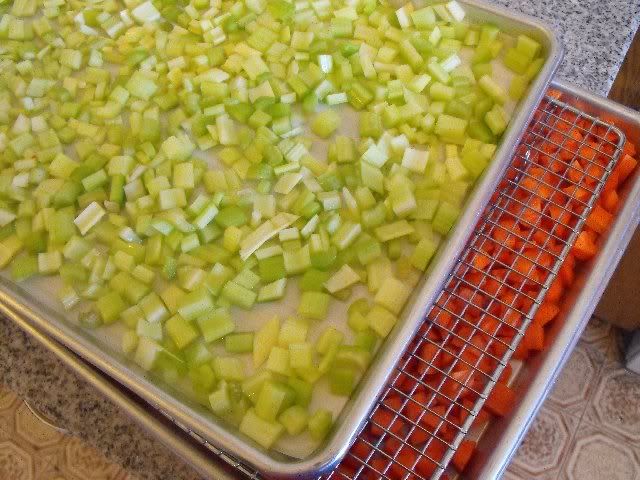
Now that you have your vegetables cut up, you have a few options. If you bought way too many vegetables like I did when I was shooting these pictures, you'll probably want to freeze some of them for later use. You'll want some cookie sheets, or if you have a restaurant supply store nearby you can pick up "half-sheet pans", which are basically just commercial-grade cookie sheets.
I like to lay down a sheet of parchment on each sheet pan. You don't have to, but keep this in mind: the frozen veggies will stick to the pan itself a lot easier than to a sheet of parchment. Lay out the veggies on the pan, in as thin a layer as you can get it. If you have a lot of veggies like I did, you can put a cooling rack on top of the veggies, add another pan and repeat, but I wouldn't go more than three sheet pans high. The more you stack, the longer it will take to freeze, and you really do want these veggies to freeze as quickly as possible.
Move the sheet pans into the freezer and leave them there for at least two or three hours. Try not to open the door for the first couple of hours; it just slows down the freezing process. When they're nice and cold, you can move the veggies into a resealable plastic bin or bag, and then directly back into the freezer (once you've written the day's date on them, of course).
It's up to you whether you want to store them separately, or mix together the ratios yourself for freezer storage. Personally, I like to keep them separate. It offers me a little more freedom if I end up needing, say, a cup of carrot puree. I can't think of any reason offhand why I would need such a thing, but stranger things have happened.
I have another post written that makes excellent use of this mirepoix, but I have no photos to accompany it. Stay tuned, and as soon as I have photos I will post them.
Thanks for this helpful tips. I'm still yet to catch up with our lessons on knife skills, and this is quite helpful, so thanks.
ReplyDeleteKershaw, what classes have you been attending? When I was learning my knife skills, I used the internet and practice at home. While yours might have better foundation in the culinary world, I'm quite sure that my self-taught skills could do about the same as yours.
ReplyDelete